We've detected that you're using an ad blocker. Ads help us keep this website free and running. Please disable your ad blocker to continue accessing our content.
Checking...
Detection ID: --
uBlock Origin: Click the extension icon → Click "Power" button (blue to gray) → Refresh
AdBlock Plus: Click ABP icon → "Enabled on this site" toggle → Refresh
AdGuard: Click shield icon → "Block ads on this website" toggle → Refresh
Brave Browser: Address bar shield icon → Turn off "Shields Up" → Refresh
Explore all our services and tools
Type at least 3 characters to search
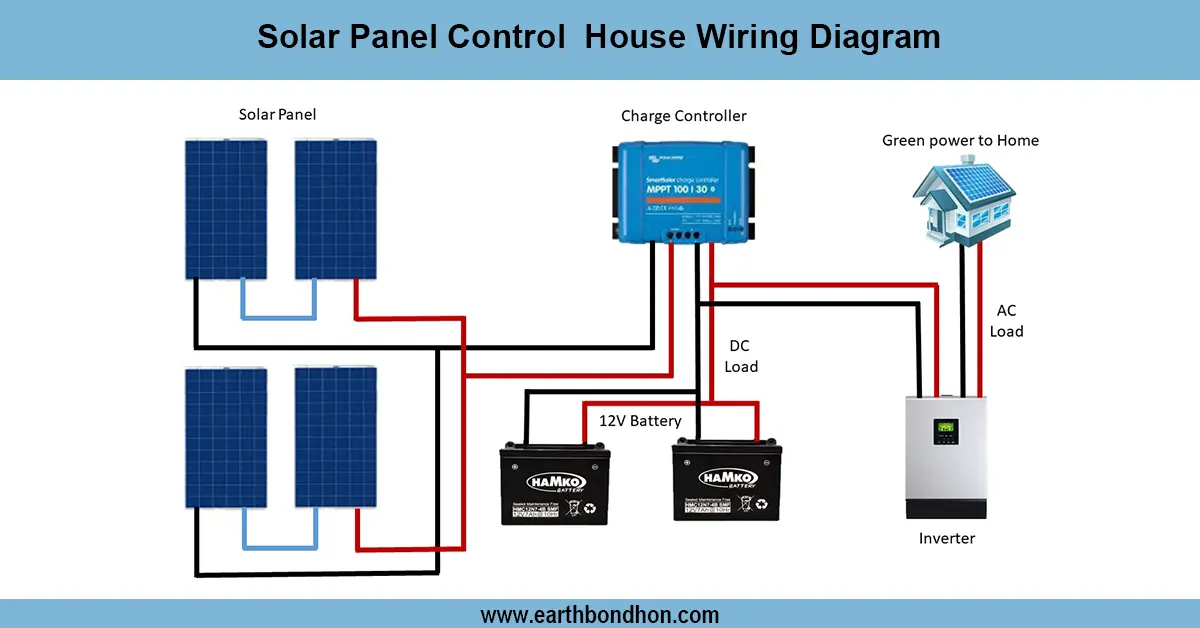
Learn solar panel house wiring diagram with charge controller, battery, and load for a safe, efficient DC/AC power supply in home systems.