Flip-Flop Circuit
Build a simple flip-flop circuit using BC547 transistors. Toggle LEDs or other loads on/off alternately for hobby electronics and learning purposes.

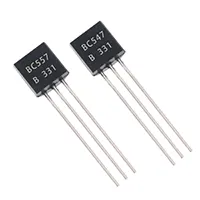
simple LED flip-flop DIY
The circuit in Figure 4 below is a flip-flop circuit with transistors BC547 to switch the conduction states, alternating the output, say LEDs. It shows the application of a bistable multivibrator to electronic study and hobby projects.
DIY transistor flip-flop
The Flip-Flop Circuit with BC547 is a simple bistable multivibrator that is used to switch two outputs alternately. The circuit is established with two BC547 NPN transistors, resistors, and capacitors to establish a stable toggle action whereby one LED is ON and the other is OFF and vice versa. The circuit is particularly suitable for the LED blinkers, the signal indicators, the toggle switches, and the elementary electronics. Under power, one of the transistors is then taken, and its LED is ON. The capacitor that is connected at the base of the other transistor charges and ultimately changes the state, making the second LED ON and the first OFF. The rate at which the blinking is altered depends on the adjustment of the resistor and capacitor values. The design is not complex, cheap, and easy to learn the concepts of transistor switching, timing, and feedback. It could also be expanded to control the relays, buzzers, or other devices with low current.
Work / Installation (Inputs → Outputs)
- Power Input → DC supply (5–12V).
- BC547 Transistors → Alternate conduction switches LEDs or loads.
- RC Network → Capacitors and resistors control toggle timing.
- Output → LEDs or devices toggle ON/OFF alternately.
- Installation → Assemble on PCB or breadboard; connect LEDs with current-limiting resistors; apply DC voltage; adjust RC for desired toggle rate.
Testing & Final Adjustments
Connect the circuit, apply DC power, and monitor the behavior of LEDs. LEDs ought to be switched back and forth. Vary the value of the resistor and the capacitor to vary the switching speed. Make sure of the right polarity and orientation of transistors and LEDs. Load testing must be done with smaller loads before linking to other equipment. Check a stable alternating operation that does not flicker, or the two LEDs turn off at the same time. Switching is to be tested again to make sure it is reliable. The correct tweaks would ensure that the circuit using flip-flops can be used in hobby electronics and in learning and DIY toggle applications.