
Series Testing Board Connection
Learn how to wire a series testing board with multiple sockets and bulbs. Ideal for electricians and students testing AC appliances or basic electric setups.
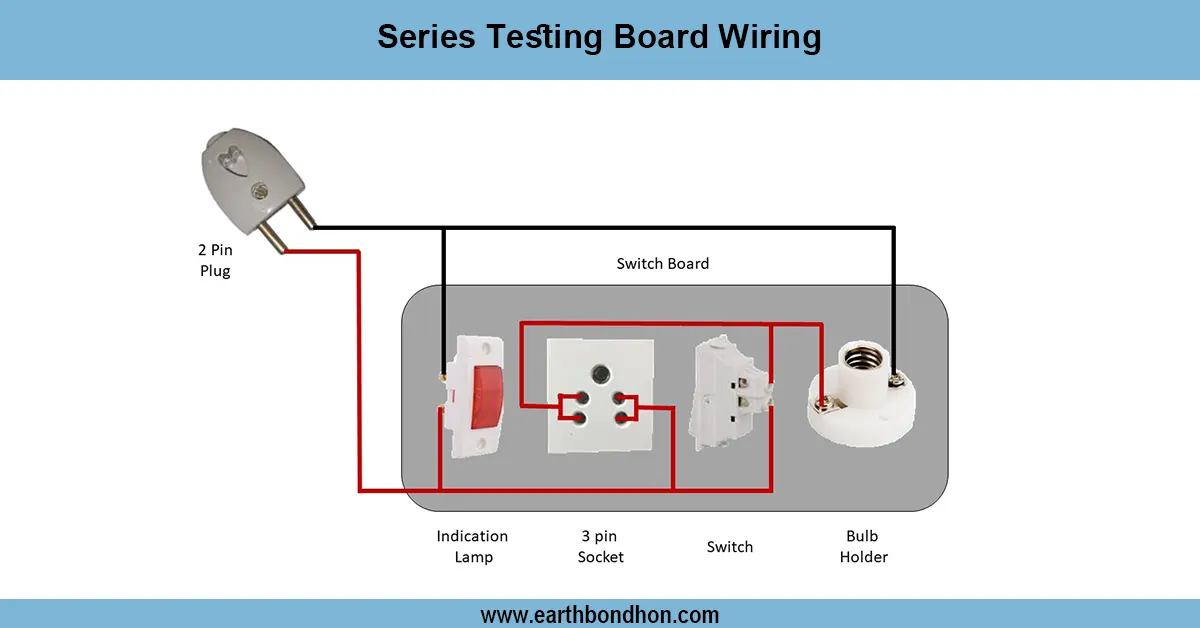
how to make a series tester board
Safe appliance testing is only possible with the help of the Series Testing Board. It works with a lamp connected in series so as to diagnose faults that may include shorts without exposing to full voltage. This is a step-by-step instruction on how to wire a testing board and what each part does, and the formula that is followed in a series resistance. Ideal when applied to beginners, students, and technicians.
Formula & Table Summary:
Formula Used:
Rtotal = R₁ + R₂ + ... + Rₙ
Where:
Rtotal= Total series resistanceR₁, R₂, ...= Resistance of individual elements (bulb, load)
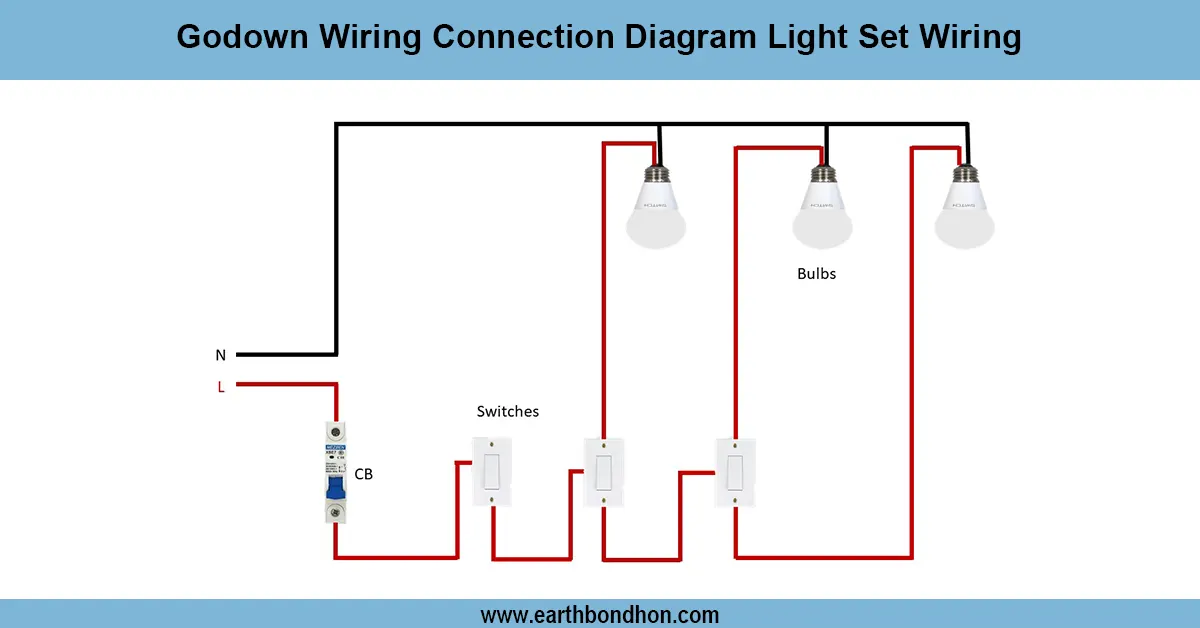
Series testing lamp diagram
A Series Testing Board is a basic electrical device which is employed on electromechanical devices such as low-capacity equipment such as bulbs, fans, chargers, and low-output appliances. It is usually designed to have inbuilt power input, a series lamp (used to restrict current), and one or more output sockets into which the test device is connected. The series bulb is placed as a safety measure where it lights partially when the test device is working or all the way in case of a short-circuit. This installation guards the user and gadget against abrupt harm. The boards are very useful when repairing a device, and they can also be found in laboratories, workshops, and homes. Electrical dangers are a great concern that requires good wiring and insulation. The guide assists you in your knowledge of the procedure (including how to connect sockets, switches, and lamps in series) in making a safe and effective testing board. It also includes a wiring diagram, a table-like summary, and a formulation elucidation to give the concept a simplistic form to the learners and practitioners.
Series connection tester board
| Component | Value / Rating | Function |
|---|---|---|
| Input Plug | 230V AC | Power supply |
| Series Lamp | 100W / 200W | Limits current, shows status |
| Output Socket | 2-pin / 3-pin | Connect appliance to test |
| Switch | SPST / DPST | Controls the test circuit |
| Indicator Lamp | 1W LED | Visual indicator |