
solar panel for low voltage
Learn how to safely wire low-voltage DC lines from solar panels to batteries, charge controllers, and DC loads for home or small off-grid applications.

dc load solar connection:
The solar panel's low-voltage DC lines are used to transport solar panel power to batteries and DC loads in a safe manner. They apply correctly sized cables, fuses, and controllers to provide a high-quality transfer of power and avoid electrical risks.
low voltage dc solar wiring:
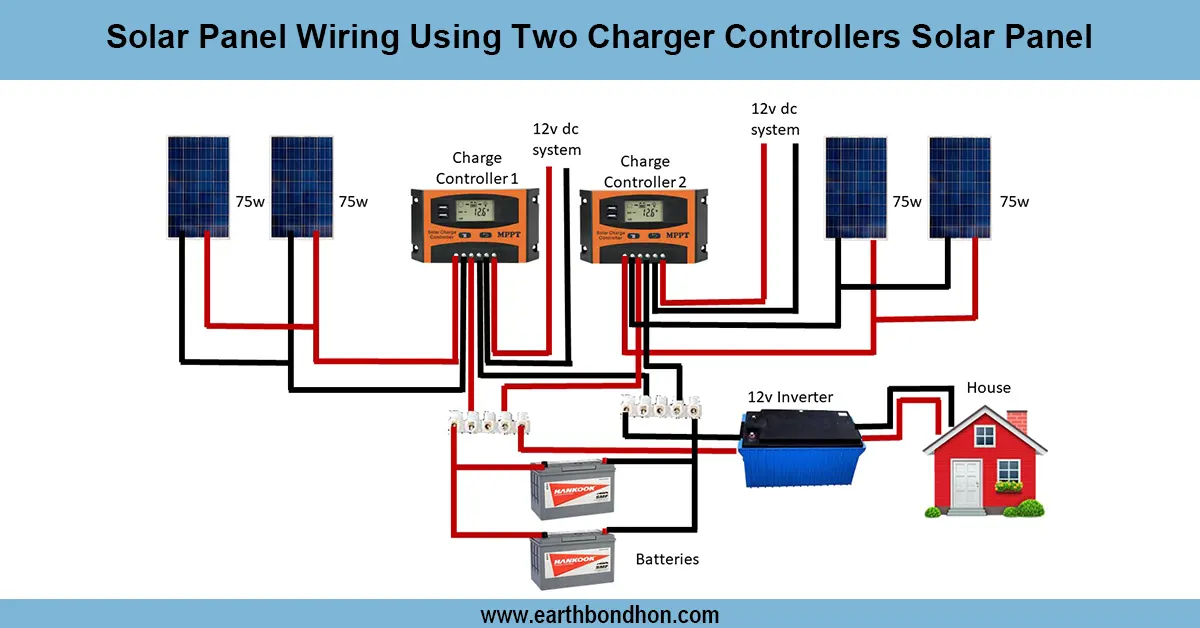
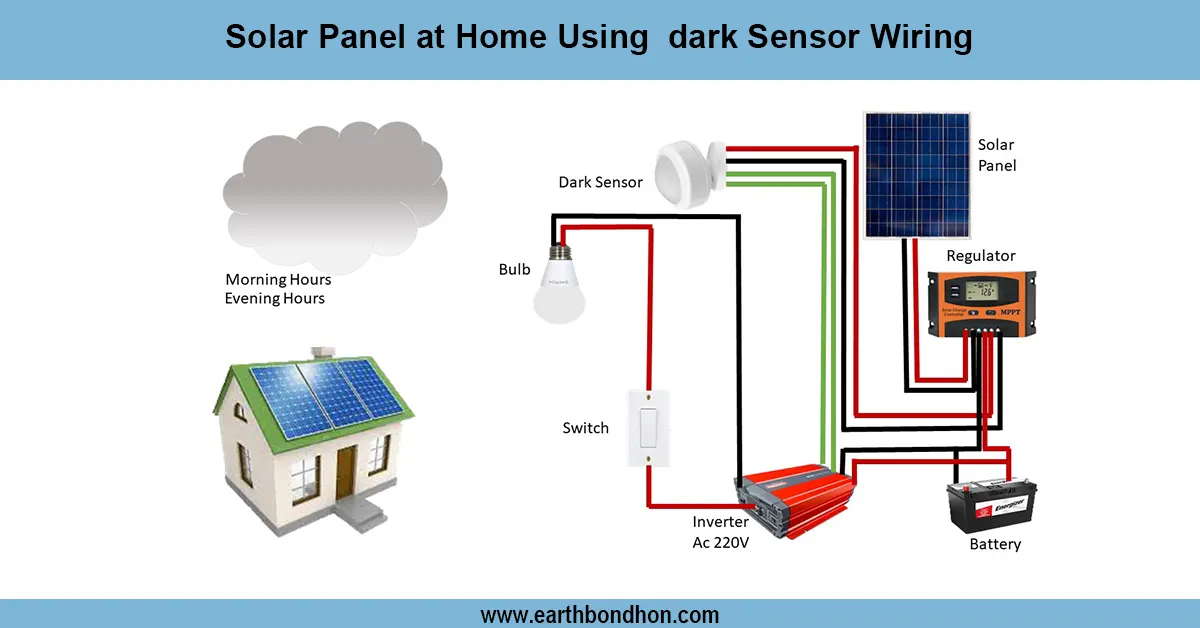
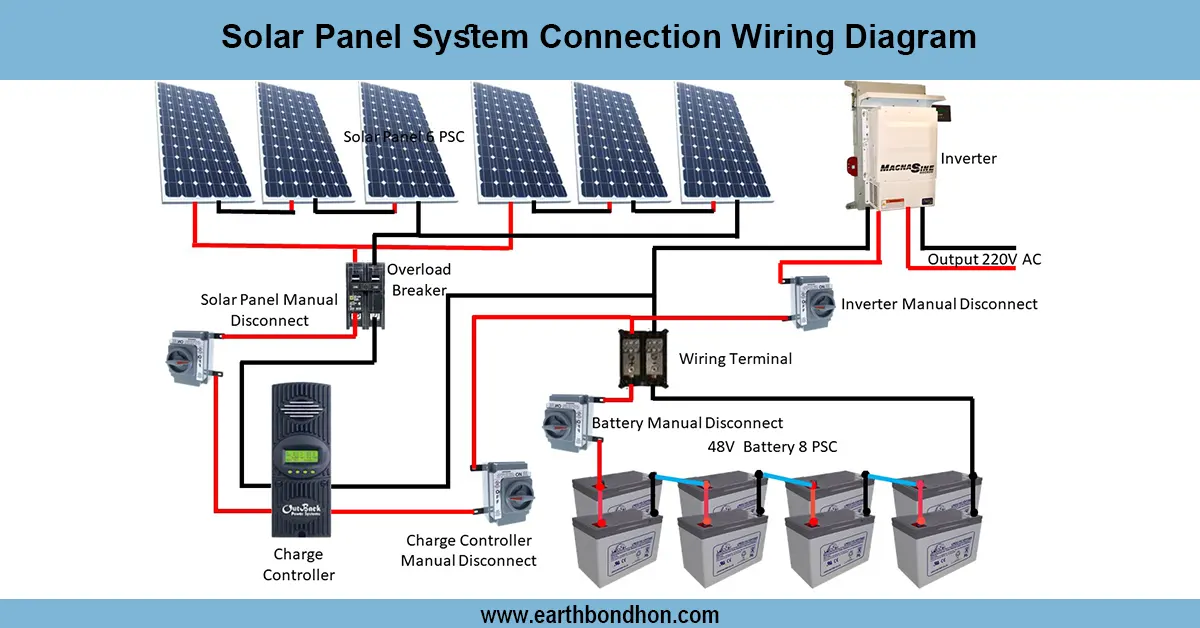
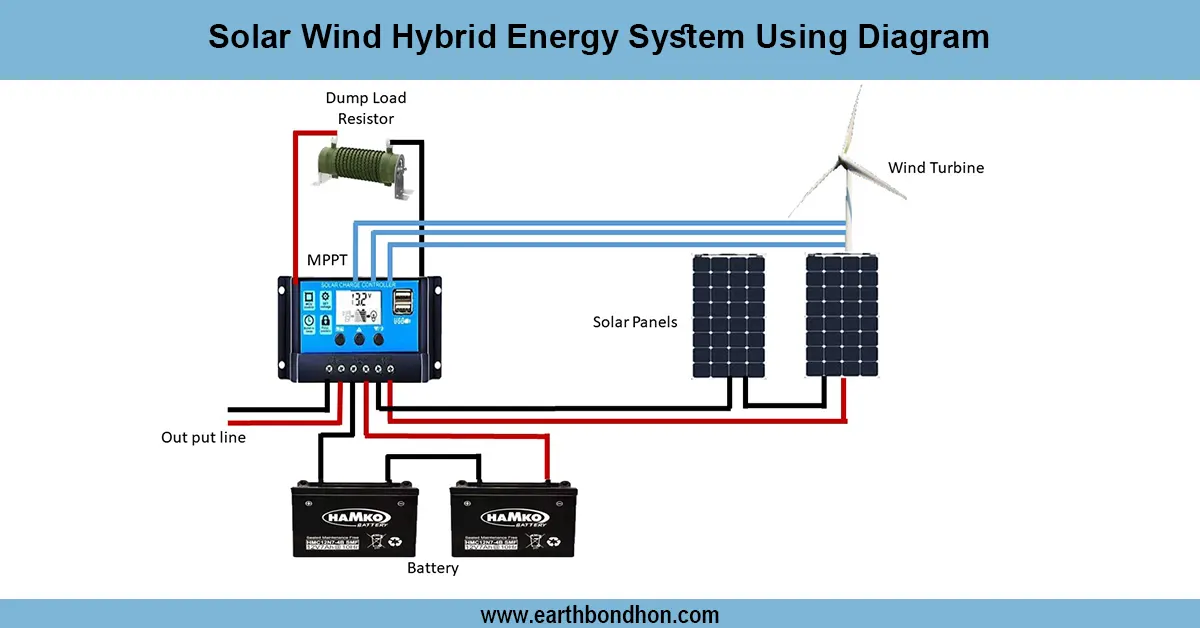
The low-voltage DC line system is a solar panel system designed to transfer solar panel power to batteries and DC loads in a safe and efficient way. Low-voltage DC systems normally use 12 V, 24 V, or 48 V, which is good in small homes, lights, fans, and low-profile appliances. The DC produced by the solar panel is passed through fuses and cables to a charge controller. The controller balances the voltage and current to charge the battery without overcharging or deep discharging it. The DC load receives power through wisely sized protection devices and wires out of the battery. There should be proper cable sizing, verifying polarity as well as insulation to avoid overheating, drop of voltage, or short circuiting. Working with low-voltage DC lines is easy, affordable, and effective in off-grid solar systems, backup, and portable solar applications.
⚡ Work & Installation (Input → Output):
- Input: Solar panel produces DC voltage from sunlight
- Step 1: Connect solar panel + and – to fuse, then to charge controller PV input
- Step 2: Charge controller regulates power to battery terminals
- Step 3: Battery stores energy and supplies DC load via properly sized cables
- Output: Stable DC voltage powers lights, fans, or other low-voltage appliances
Testing & Final Adjustments:
Once the low-voltage DC lines have been wired, the first step before connecting the solar panel to a multimeter is to check the panel voltage to verify that it is the same as the system voltage. Check that the current ratings of the fuse are adequate. Attach the battery and ensure that the charge controller is showing that it is charging appropriately. Test DC loads: Turn them ON and measure voltage at the load terminals to make sure that there is a minimal voltage drop across the load. Check cables to ensure a secure connection, correct polarity, and proper insulation. Monitor the system during the day to ensure that it charges the batteries and functions continuously with the load. Modify cable routing or size in case there is overheating or voltage drop. It is important to maintain the electrical integrity of the battery and panel surfaces, as well as to check the voltage of the battery, so it should be performed regularly in order to achieve maximum performance and good reliability.
Frequently Asked Questions - solar panel for low voltage:
What is a low voltage DC line in solar systems?
It is a line that carries 12V, 24V, or 48V DC from solar panels to batteries and DC loads.
Why use low voltage DC lines?
Low voltage DC lines are safer, efficient, and suitable for small home or off-grid solar setups.
Do I need a charge controller?
Yes, to regulate voltage and prevent battery overcharge or deep discharge.
What loads can I connect?
LED lights, fans, small DC appliances, and low-power devices.
How to prevent voltage drop?
Use proper cable size and keep wire lengths as short as possible.
Do I need fuses?
Yes, fuses protect cables, batteries, and loads from overcurrent.
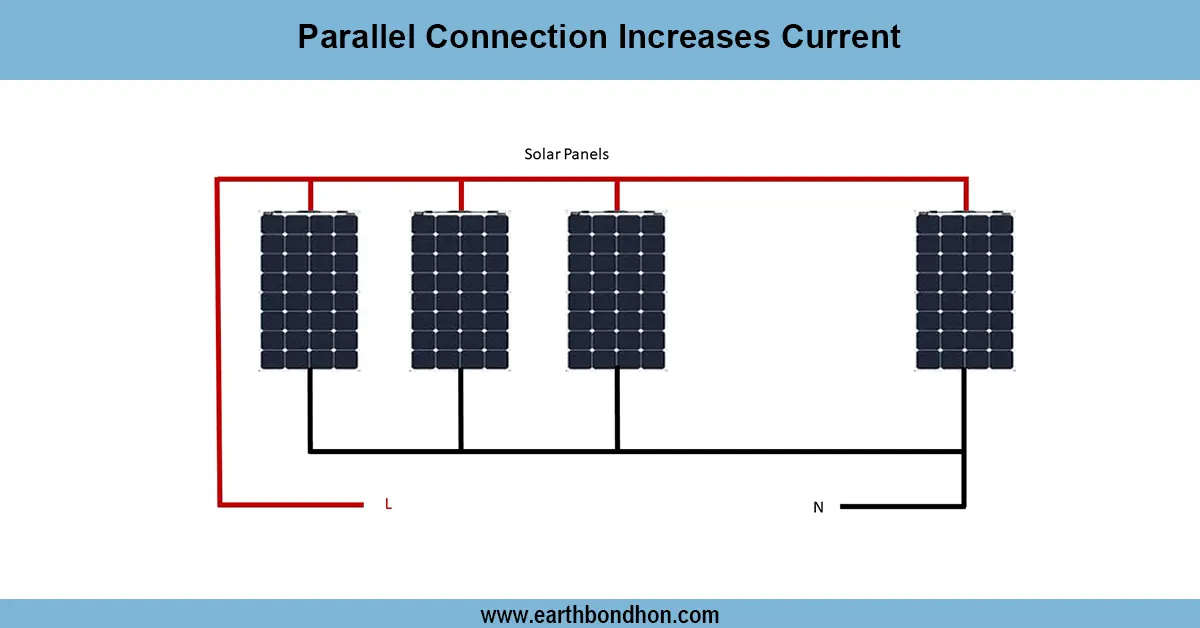
Can I connect multiple panels?
Yes, in series to increase voltage or parallel to increase current.
How do I test the system?
Measure voltage at panel, controller, battery, and load to ensure proper operation.
Is low voltage DC safe for home use?
Yes, with proper fuses, cable sizing, and polarity checks.
How long will the battery last?
Depends on usage and type; lead-acid batteries last 3–5 years, lithium up to 8 years.