


Solar Panel Wiring to Solar Inverter
Learn how to wire solar panels to a solar inverter with battery and loads for safe and efficient DC to AC power conversion for home or office systems.

solar energy inverter connection:
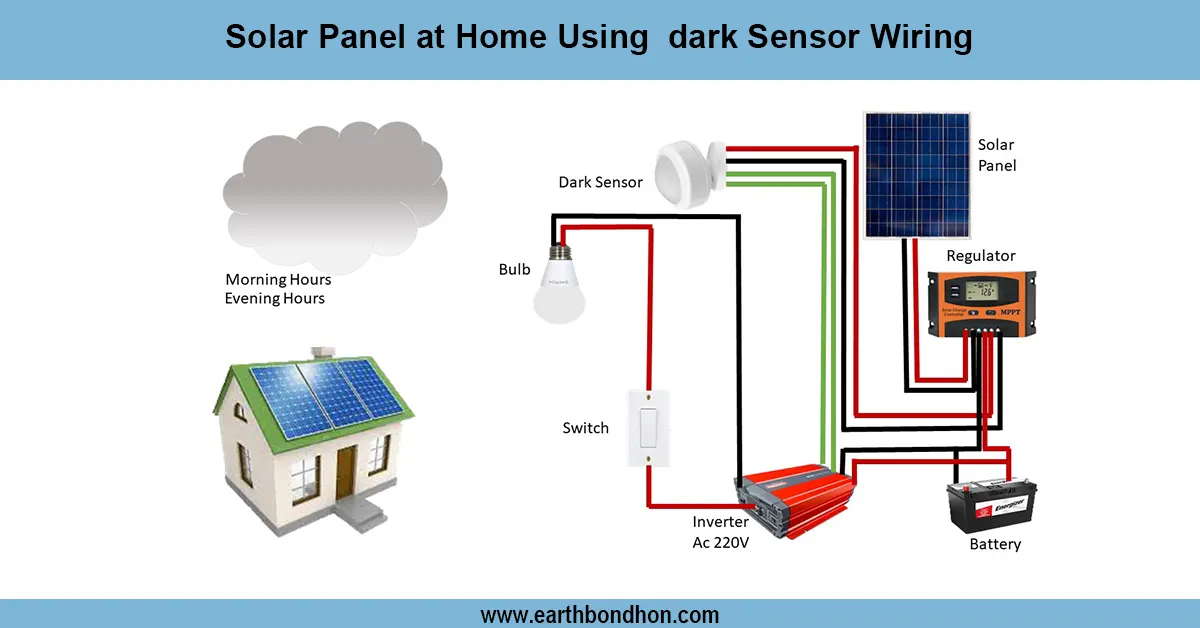
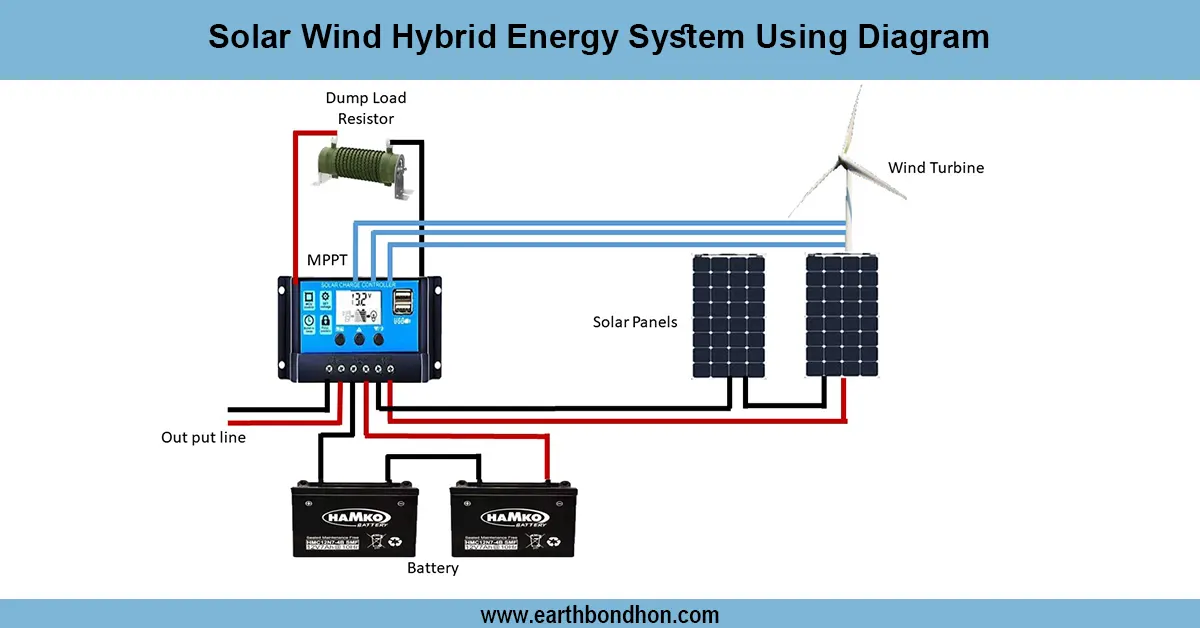
A solar panel wiring to solar inverter diagram demonstrates the way to wire solar panels with a charge controller to a A battery and an inverter. It guarantees the efficient conversion of DC to AC power to be used at home or in the office.
solar system inverter guide:
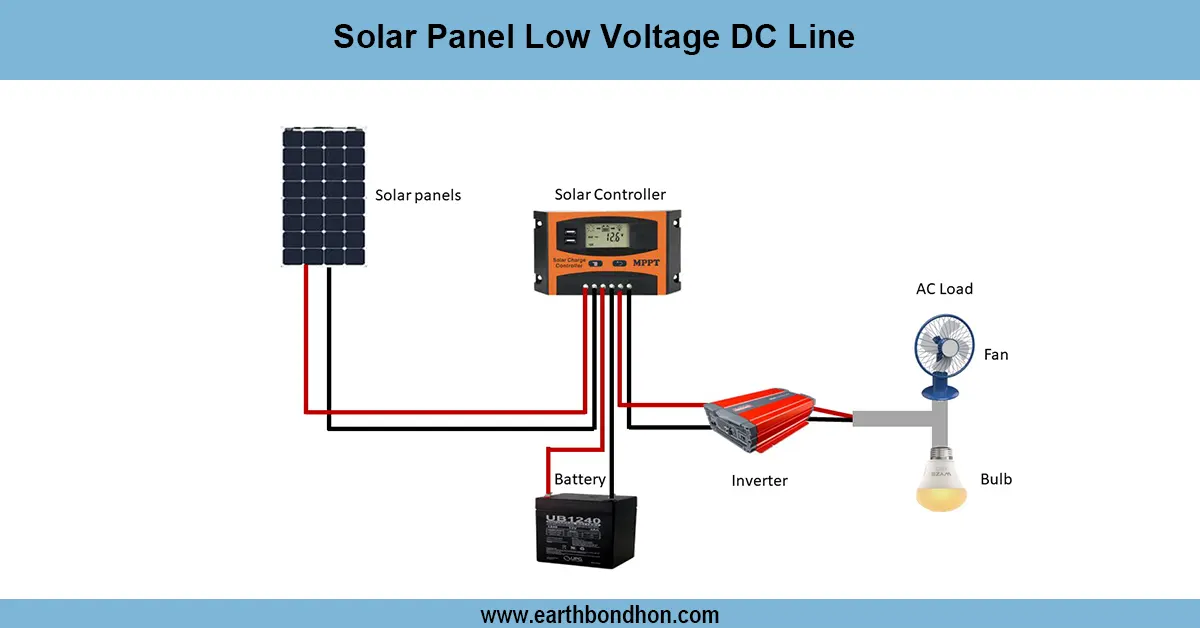
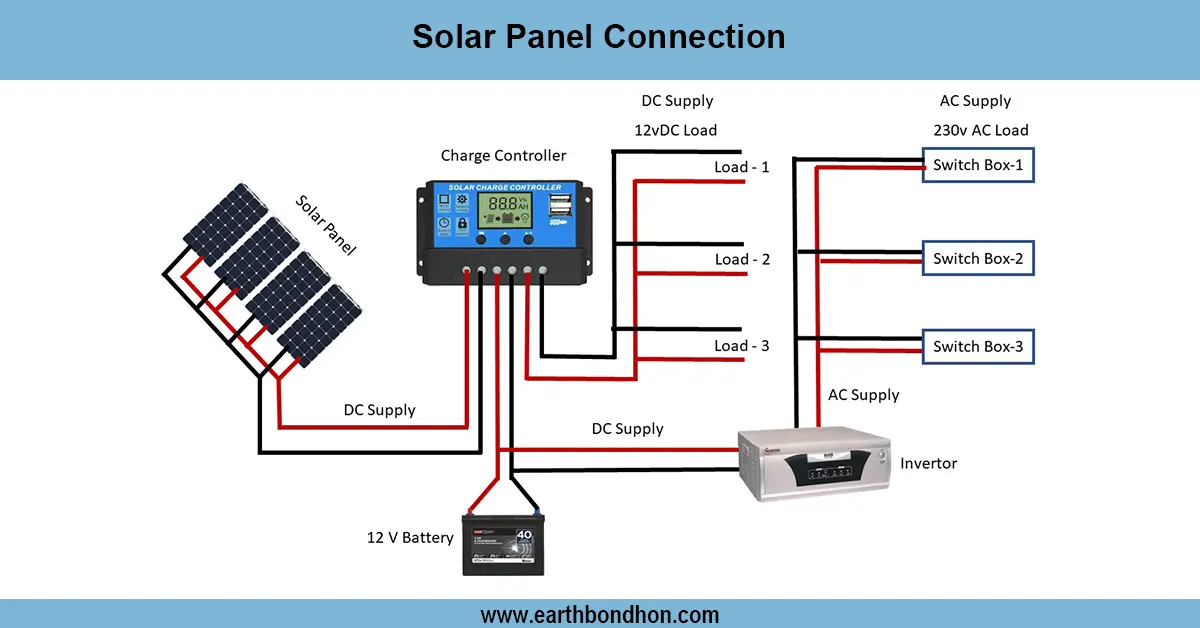
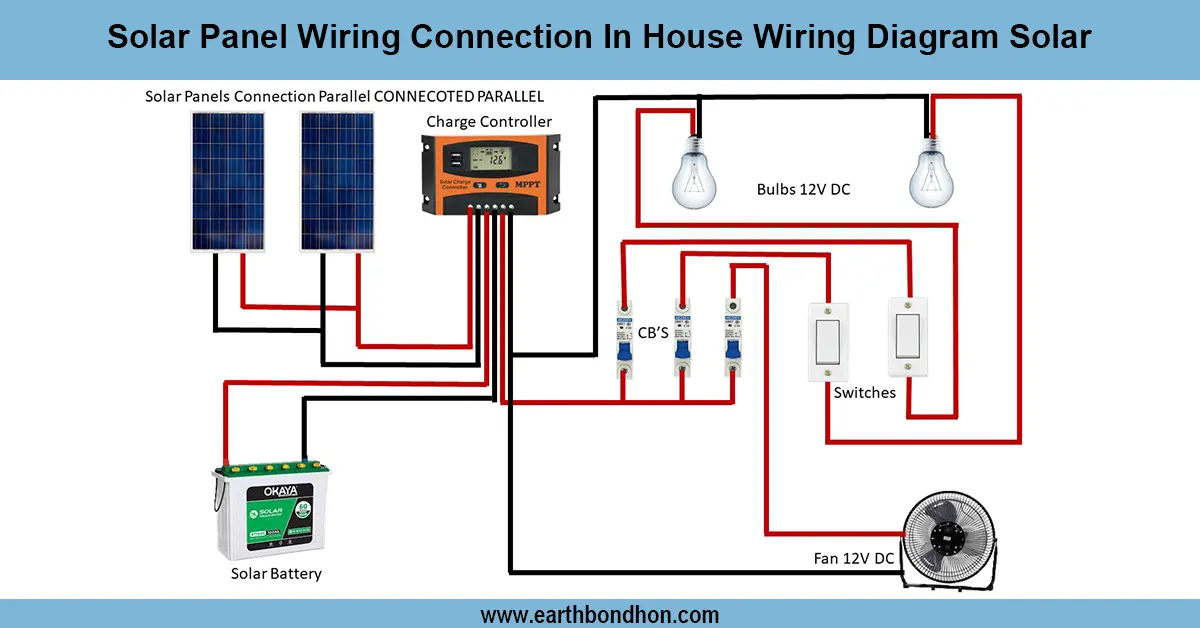
A solar panel can be wired to a solar inverter to supply DC to AC power to a home or office using the solar panel, a charge controller, a battery, and an inverter. The DC electricity produced by the solar panels is passed through a charge controller to regulate voltage and current to charge the battery safely. The solar inverter takes the DC power generated by the battery and turns it into AC power to power the appliances in the home. Panels may be stacked together to produce more voltage, or they may be stacked together to produce more current, depending on the needs of the system. The safe and efficient working of an electrical system requires proper wiring, correct sizing of cables, checks of polarity, and the use of fuses. This configuration is most frequently applied to off-grid, on-grid, and hybrid solar systems, which will provide a continuous power supply to AC, efficient energy use, and battery control.
⚡ Work & Installation (Input → Output):
- Input: Solar panels generate DC electricity
- Step 1: Panels connected in series/parallel to charge controller
- Step 2: Charge controller regulates voltage and current to battery
- Step 3: Battery stores energy for DC or AC loads
- Step 4: Inverter converts DC from battery to AC for home appliances
- Output: Clean AC power for lights, fans, and household devices
Testing & Final Adjustments:
Wire after checking all connections and securing terminals are of the right polaritsolar panel voltage voltage and current to check that the charge controller is functioning properly. Connect the battery and check the charging. Test DC loads if applicable. Connect the inverter and test the voltage of the AC output on home appliances. Make sure that all circuit breakers and fuses are installed. Check cable sizing, insulation, and routing. Move the panel to expose it to sunlight. Check the system throughout the day to ensure that the batteries are being charged, the inverter is working, and the AC load is supplied continuously. Long-term efficiency, safety, and reliability of the solar inverter system can also be guaranteed by regular maintenance, such as cleaning panels and monitoring battery health.
Frequently Asked Questions - Solar Panel Wiring to Solar Inverter:
How do I wire solar panels to an inverter?
Connect panels to charge controller, then to battery, and finally to the inverter AC output.
Do I need a battery with the inverter?
Yes, the battery stores solar energy for AC conversion and backup use.
Can the inverter supply AC loads?
Yes, it converts DC from battery to AC for home or office appliances.
How should panels be connected?
Series for voltage increase, parallel for current increase, or combination depending on system.
Do I need fuses?
Yes, fuses protect wiring, battery, and inverter from overcurrent.
What voltage system is used?
12V, 24V, or 48V DC depending on battery and inverter specifications.
Can I connect multiple solar panels?
Yes, according to series or parallel configuration based on system design.
How to test inverter output?
Measure AC voltage at appliance terminals and check inverter display for proper operation.
Does it work during power outages?
Yes, if the battery has stored energy, the inverter supplies AC loads.
Is it safe for home use?
Yes, with proper wiring, fuses, polarity checks, and cable sizing.