Solar Panel Wiring using two charger controllers
Learn how to wire solar panels using two charge controllers for dual-battery systems to ensure safe, efficient DC power distribution and home energy management.

pwm/mppt dual controller wiring:
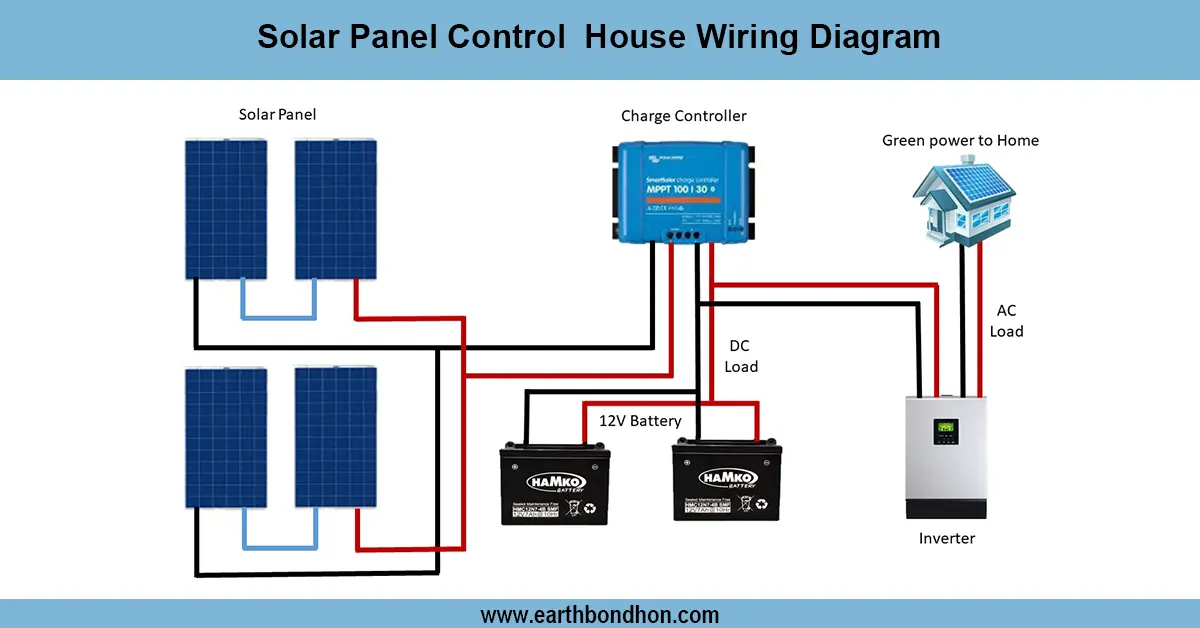
The two-charger solar panel wiring diagram demonstrates the safe way in which panels can deliver DC power to two battery banks. Charging is controlled independently by each controller to provide efficiency, battery safety, and continuous power to DC or AC loads.
two charge controllers solar setup:
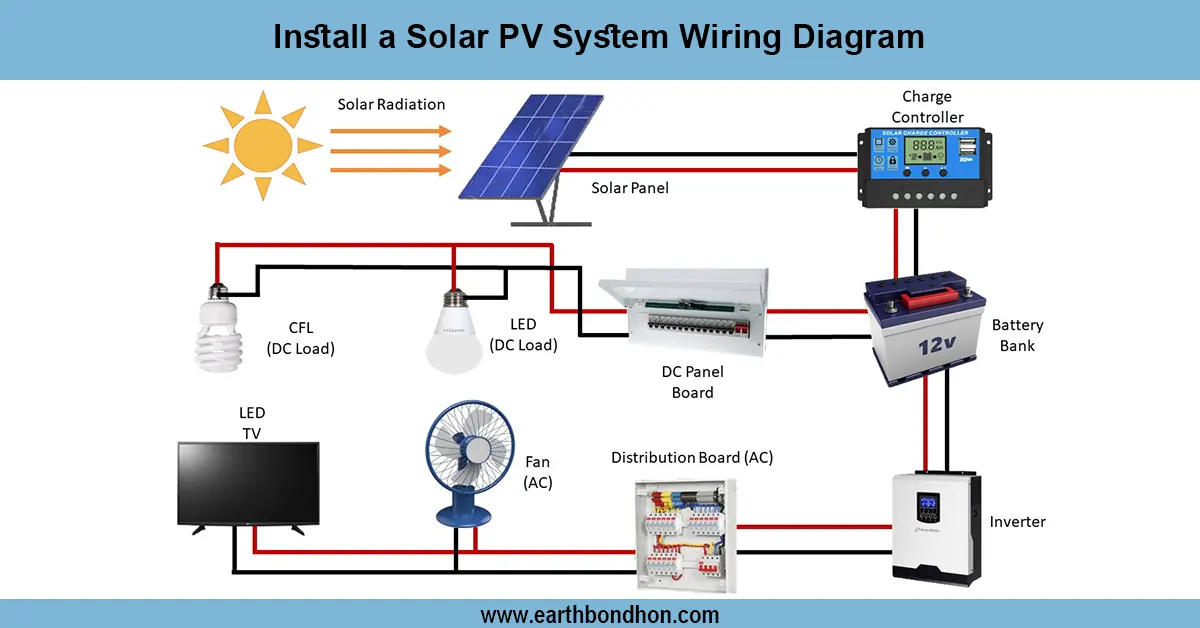
Two charge controllers can be wired together to solar panels in applications with two batteries or multiple loads, where the battery system is either off-grid or at home. The solar panels are divided or interconnected to provide DC power to two separate charge controllers. The controllers control independent battery banks, thus eliminating unsafe charging and overcharging. The panels may be stacked up in series or in parallel, depending on the voltage and the current needs. DC loads may be hard-wired to each bank of batteries, and an inverter can be used to aggregate the output to be used by AC appliances. Electrical hazards should be avoided by proper wiring, fuses, appropriate cable size, and checking of polarity. Dual-controllers are designed to maximize energy usage, increase battery li, and provide a flexible allocation of loads. This system can be applied to larger home solar systems, hybrid systems, and off-grid power systems that need to have an efficient battery charge and consistent load operation.
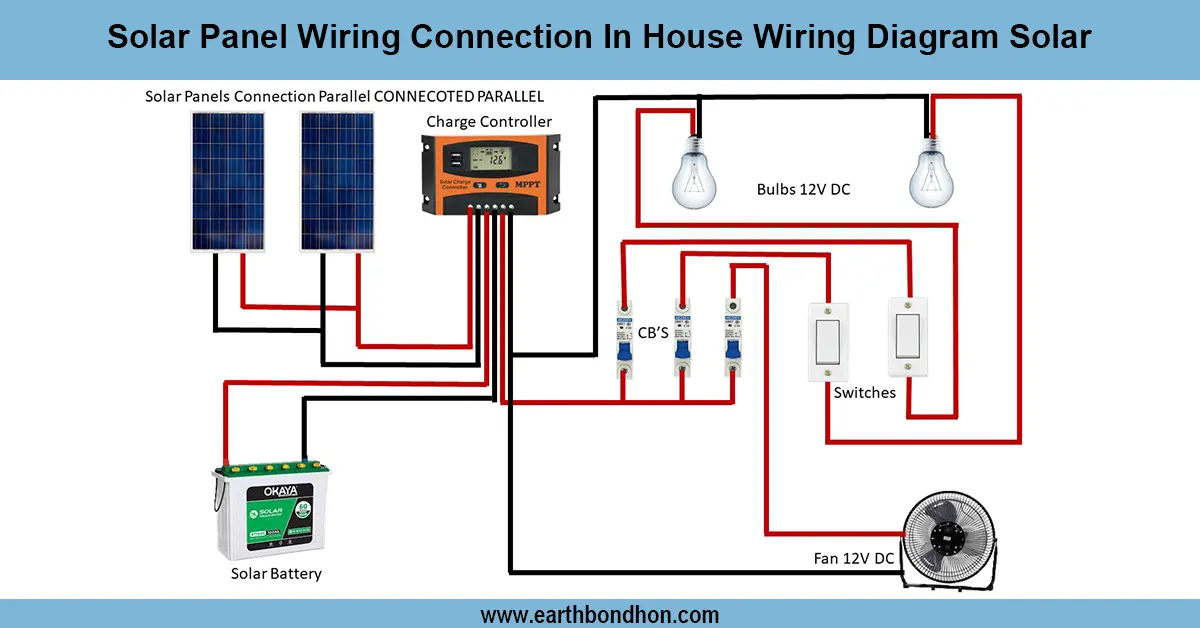
⚡ Work & Installation (Input → Output):
- Input: Solar panels generate DC electricity
- Step 1: Split or connect panels to two separate charge controllers
- Step 2: Each charge controller regulates voltage and current to its respective battery bank
- Step 3: Connect DC loads to respective battery outputs
- Step 4: Optionally, use an inverter to combine DC for an AC load supply
- Output: Safe, efficient DC/AC power with balanced dual-battery charging
Testing & Final Adjustments:
Following wiring, verify all connections are of proper polarity at the panel, controller, and battery. Check the anel voltage to check the correct input to each controller. Install the batteries and ensure that the individual controllers are charging. Test DC loads are attached to both batteries, and the voltage is measured at the terminals. In the case of The inverter and appliances must be connected and checked regarding the AC output. Check cables to ensure that they are of the right size, connected, and well-insulated. Fuse or circuit breakers should be installed between panels and controllers, and also between controllers and batteries to avoid accidents. Check the system during the day to ensure that both batteries are constantly charged and that the load is running. Maximize the amount of sunlight by adjusting the orientation of the panel, and make sure the controllers are programmed to use the correct type of battery, and charging profile. Safe, efficient, and reliable Dual-controller solar operation is achieved through proper testing.
Frequently Asked Questions - Solar Panel Wiring using two charger controllers:
Why use two charge controllers?
To manage dual battery banks safely and efficiently, preventing overcharge and balancing loads.
Can I connect all panels to one controller?
Yes, but using two controllers allows independent battery management and better energy distribution.
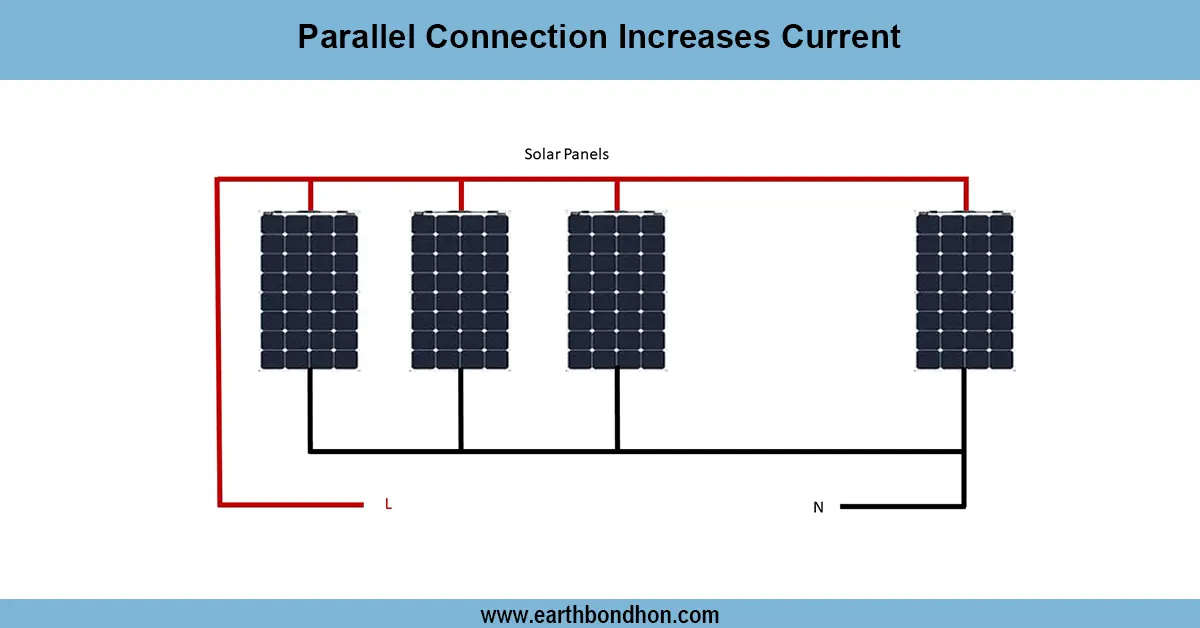
How should panels be connected?
Panels can be split between controllers, connected in series or parallel depending on voltage and current requirements.
Do I need separate batteries for each controller?
Yes, each controller should manage its own battery bank for safe operation.
Can I power DC and AC loads?
Yes, DC loads can connect directly to each battery, and AC loads require an inverter.
Are fuses necessary?
Yes, fuses protect wiring, batteries, and controllers from overcurrent and short circuits.
What voltage systems can be used?
12V, 24V, or 48V DC depending on battery and controller specifications.
How to test the dual-controller system?
Measure voltage at panels, controllers, and batteries; check load operation and battery charging.
Does it work at night?
Yes, batteries supply stored energy to loads when solar panels are inactive.
Is this setup safe for home use?
Yes, with correct wiring, fuses, polarity checks, and cable sizing, it is safe and efficient.