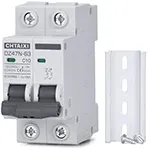


submersible motor control box wiring
Learn submersible pump control box wiring with starter, overload, MCB, and float switch for safe automatic pump operation in borewells and tanks.

automatic pump control box wiring
The wiring diagram of the submersible pump control box illustrates the connections to be made between the AC supply, MCB, starter, overload relay, and float switches so as to make pumps safe and automatic in water tanks and borewells.
automatic water pump control box connections:
Submersible pump control box wiring would provide safe, reliable, and automatic operation of submersible pumps in borewells, wells, or water tanks. A DOL or star-delta starter, overload relay, MCB, and float switches are usually found in the control box. The principal AC supply is supplied into the control box, where it is linked to the starter and MCB. The starter has the function of motor start and running; the overload relay prevents overcurrent or overheating of the motor. A float switch is attached to the pump in order to start and switch it off in accordance with the level of water. Earthing is done properly to provide safety and to avoid electrical hazards. Adherence to the wiring plan will secure a normal operation and energy consumption of the motor and prolonged protection of the pump. This is commonly applicable in residential, agricultural, and commercial water pumps to avoid dry operation situations, short-circuit problems, and maintenance, and automatic operation maintenance of the water supply can be done.
Work & Installation (Input → Output,)
- Input Supply: Connect single-phase or three-phase AC to control box terminals.
- MCB/Main Breaker: Provides circuit isolation and short-circuit protection.
- Starter (DOL/Star-Delta): Controls motor start and running current.
- Overload Relay: Protects the motor from overcurrent and overheating.
- Float Switch Connection: Connect low/high water level float switches for automatic ON/OFF.
- Motor Connection: Starter output terminals connect to submersible pump motor.
- Earthing: Proper grounding for safety of motor and control box.
- Operation: Motor starts on low water level, stops at high level or in case of faults.
- Output: Automatic, safe, and efficient pumping with overload and dry-run protection.
Testing & Final Adjustments
Wire then tip on the control box and input voltage. Test the start of the motor working on a low water level and check that it runs without a problem. Stop and direction of motor rotation. Turn on the high-level float switch to ensure automatic stop. Check the wiring to ensure that it is securely connected, insulated, and earthed. Overload Relay-test overcurrent by simulating overcurrent to make sure that tripping occurs. Switch Tests Test MCB off and on. Repeat several working cycles in order to check stable automatic functioning. Mark all connections, terminals, float switches, and motor connections with labels that may be used by maintenance. Proper testing eliminates motor damage, dry runs, and electrical hazards. Periodical checks of float switches, overload relays, and MCBs guarantee reliability, safety, and efficiency in the use of energy. Adherence to the wiring diagram ensures the safety standards and easy automatic work of submersible pumps.
Frequently Asked Questions - submersible motor control box wiring:
What is a submersible pump control box?
A box managing motor starting, protection, and automatic operation of submersible pumps.
Which starters are used?
Direct On Line (DOL) or Star-Delta starters.
Why use float switches?
To automatically start or stop the pump based on water level.
Is overload protection necessary?
Yes, to prevent motor damage from overcurrent or overheating.
Can it work with single-phase supply?
Yes, designed for single-phase or three-phase motors.
How is the motor connected?
Output from starter goes to submersible pump motor terminals.
Is earthing required?
Yes, for safety of motor and control box.
What is MCB used for?
To isolate the circuit and protect against short circuits.
Can the pump run automatically?
Yes, float switches control start/stop automatically.
Why follow wiring diagram?
Ensures safe, reliable, and efficient motor operation.