

Timer and Contactor wiring Diagram
Learn how to wire a contactor using a timer for safe automation. Step-by-step input-to-output wiring, testing, installation, and safety tips included.

contactor in using by timer wiring
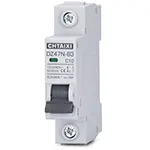
Connect the relay output of the timer to the contactor coil (A130 A2). Connect the main supply to the contacts of the contactor to the load. Use MCB/RCCB for protection.
timer with contactor wiring
Using timer wiring, A simple automation technique is to use a contactor in conjunction with a timer to switch high-current loads by controlling the contactor coil with a timer. The timer is programmed to have ON/OFF schedules, whereas the actual power is activated to loads by the contactor, which includes: motors, pumps, fans, heaters, and lights.
A contactor coil (A1 and A2) is attached to a timer output in this wiring system. At a time when the timer is triggered, the coil becomes energized and the main contacts of the contactor are closed, thereby enabling current to flow between the supply and the load. When the timer is switched off, the coil is released and the contacts are open, which breaks the load.
This prevents the heavy current than the timer relay to directly carry, which guarantees longer life of the relay and safe operation. Proper wiring should have an MCB or RCCB to protect, an appropriate connection of the neutral and earth, and a small fuse to control the circuit.
Its wide range of applications is automatic water pump control, lighting automation, HVAC, and industrial machines, which makes it convenient, safe, and energy-efficient.
Work / Installation (Inputs → Outputs)
Input: Main supply → MCB/RCCB → Timer → Contactor coil (A1, A2).
- Power the timer with supply phase and neutral.
- Connect the timer relay output to A1 of the contactor coil, and neutral to A2.
- Route the main supply phase through the contactor’s input terminals (L1, L2, L3). For single-phase loads, use one pole.
- Take output from the contactor’s output side (T1, T2, T3) to the load.
- Connect neutral directly to the load (or through a 2-pole contactor).
- Always connect earth wire for safety.
Output: When the timer switches ON, the contactor coil energizes, contacts close, and power flows to the load.
Testing & Final Adjustments
Wire after, then make the system work by programming a short ON/OFF cycle in the timer. Check the A1 and A2 voltages to determine whether the timer is ON. Make sure that the contactor pulls in smoothly and releases when OFF. Check output supply--supply at the load side and verify correct switching.
Check every connector: tighten and insulate. Check proper phase, neutral, and earth connections. Test trip MCB/RCCB functionality to provide fault protection. Manually adjust the clock, weekly schedule, and automatic/manual settings of the timer as required.
Additional security measure: a timer output is driven through a small fuse, and a surge suppressor is placed across the coil. After testing, label wires, screw terminals, and cover wires and terminals. This guarantees good operation and automation of electrical loads with safety.