Creators
Rojony Khatun Author
Rojony Khatun
CalculatorToolsProjectExpert
Reviewers
Małgorzata Koperska, MD Steven Wooding
Last updated: January 14, 2026

DC Motor Speed Controller Circuit Using IRFP450PBF MOSFET

🇺🇸
English
Default
🇪🇸
Español
Spanish
🇫🇷
Français
French
🇩🇪
Deutsch
German
IRFP450PBF MOSFET

IRFP450PBF MOSFET

A high-voltage N-channel power MOSFET with a maximum drain-source voltage of 500V and current handling up to 14A.

10K Fixed Resistor

10K Variable Resistor

Adjustable resistor with 10,000 ohm resistance

10K Fixed Resistor 1/4W

10K Fixed Resistor 1/4W

A 10,000-ohm resistor rated for 0.25 watts

[10k-fixed-resistor-1/4w]
0.22R Fixed Resistor 1/4W

0.22R Fixed Resistor 1/4W

A 0.22-ohm resistor rated for 0.25 watts

1N4007 Diode

1N4007 Diode

General-purpose 1000V, 1A diode

*Please note: These are affiliate links. I may make a commission if you buy the components through these links. I would appreciate your support in this way!

DC Motor Speed Controller

Control DC motor speed efficiently using IRFP450PBF MOSFET. A PWM-based circuit provides smooth speed regulation for small to medium power motors.

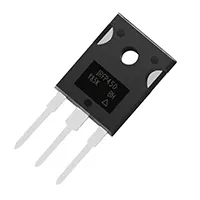
IRFP450PBF DC motor speed controller

An IRFP450PBF-based DC motor speed controller offers smooth control over the speed with speed control using PWM. It works well with robotics, automation, and with small equipment that needs efficient control of motors.
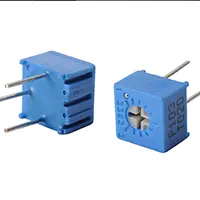
beginner friendly breathing led circuit diy

A one-transistor breathing LED circuit is a simple and interesting electronic circuit that produces a breathing effect or a fading effect on an LED. This effect is common in decorative lighting, electronic toys, and learning circuits since it will mimic a natural fade-in or fading of light with just one transistor, a few resistors, a capacitor, and an LED.

The principle behind the one-transistor breathing LED circuit is that a timing capacitor is charged and discharged by flowing through a resistor over the base of the transistor. As the capacitor voltage increases, the transistor slowly turns on, and the brightness of the LED increases. As the capacitor discharges, the transistor gradually switches off, which is an effort to dim the LED. This leaves a flowing, pulsating radiance that seems to be in the form of a breathing pattern. This is a good project to do even by those who are just starting to le, as it will teach them how to operate transistors, timing circuits, and LEDs. Here, we provide details of the parts, the principle of operation, a circuit diagram, step-by-step as, and troubleshooting tips for assembling a transistor-breathing LED circuit.

Single Transistor Breathing LED

Low-cost, simple fading LED circuit using just one transistor.

Advantages of Using a Single Transistor

  • Low Component Count: Only one transistor plus resistors and a capacitor.
  • Cost-Effective: Very cheap to assemble.
  • Simple Design: Ideal for electronics beginners.
  • Low Power Consumption: Suitable for battery operation.
  • Attractive Visual Effect: Smooth fade-in and fade-out of LED.

Components Required for DIY Circuit

  • NPN Transistor (BC547 / 2N2222) — 1 (Switching and amplifying LED current)
  • LED (any color) — 1 (Light output)
  • Resistors (1kΩ – 100kΩ) — 2–3 (Current limiting & base bias)
  • Capacitor (10µF – 100µF) — 1 (Timing for fading effect)
  • Power Supply (3V – 9V DC) — 1
  • Breadboard / Perfboard — 1
  • Jumper wires — As needed

Working Principle

LED and Transistor Connection: LED connected to collector; transistor acts as variable resistor controlling brightness.

Timing Capacitor and Resistor: Capacitor charges via resistor → transistor conduction increases → LED brightens; discharges → LED dims.

Output Brightness Control: Adjust resistor or capacitor to change fade speed; higher capacitor → slower breathing.

Power Supply: 3V–9V DC; ensure LED forward voltage matches supply with current-limiting resistor.

Circuit Diagram Explanation

  • Transistor Base → Capacitor + resistor network
  • Collector → LED + series resistor → VCC
  • Emitter → Ground
  • Timing Capacitor → Charges/discharges to create fade effect

Step-by-Step Construction Guide

  1. Place NPN transistor on breadboard; identify collector, base, emitter.
  2. Connect LED anode to collector via current-limiting resistor; cathode to emitter (ground).
  3. Add RC timing network: Resistor from VCC to base, capacitor from base to ground.
  4. Connect 3V–9V DC power supply; LED should start breathing automatically.
  5. Adjust fade speed by changing the capacitor value or using a potentiometer for a variable resistor.

Applications

  • Decorative LED lights
  • Electronic toys and gadgets
  • Visual indicators in DIY projects
  • Learning project for electronics students
  • Night lamps with gradual illumination

Troubleshooting Tips

  • LED not glowing: Check transistor orientation and LED polarity.
  • LED stays fully ON: Capacitor may be shorted or resistor too low.
  • LED blinks instead of smooth fading: Increase capacitor value or resistor.
  • No effect: Verify power supply voltage matches LED requirements.
  • Slow fading: Use lower capacitor or resistor value for faster breathing.

Frequently Asked Questions - DC Motor Speed Controller:

What is IRFP450PBF used for?

It is a high-current N-channel MOSFET used for switching DC motors.

Can it control motor speed?

Yes, using PWM signals to adjust duty cycle.

Is it suitable for high current motors?

Yes, within the MOSFET's rated current.

Can it reverse motor direction?

Optional H-bridge allows forward and reverse control.

Do I need heatsinks?

Yes, recommended for high-current operation.

Are flyback diodes necessary?

Yes, they protect the MOSFET from voltage spikes.

Is it beginner-friendly?

Intermediate-level; knowledge of MOSFETs and PWM is required.

Can it be used in robotics?

Yes, ideal for robotics and automated motor projects.

Can I vary speed smoothly?

Yes, PWM provides precise and smooth speed control.

Is it cost-effective?

Yes, uses readily available components for reliable performance.

Comments

Please login to comment.

Rojony Khatun

Rojony Khatun

Calculator Tools Project

Rojony Khatun is the creator of a free online tools website designed to simplify everyday and engineering-related calculations for students, professionals, and hobbyists. The platform offers a wide variety of basic and advanced calculators across key categories, including Electrical Calculators, Electronic Calculators, and Time & Date Calculators, helping users solve problems quickly and accurately.