Digital Timer Connection Diagram
Learn how to wire a digital timer with a pump motor for automatic operation. Step-by-step input-output wiring, testing, and safety instructions included.

Water pump automation wiring
Connect the timer supply to the timer, the timer output to the contactor coil, and the contactor to the pump motor. Automatic ON/OFF control timer set.
Timer motor control wiring
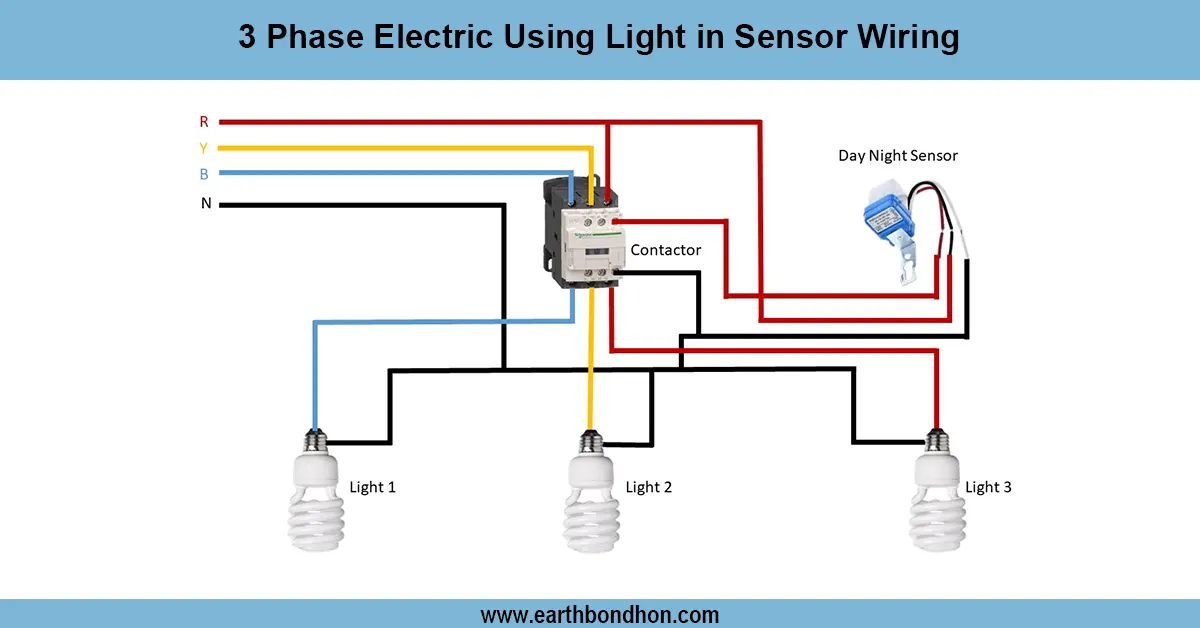
The pump motor wiring system is automated by a digital timer that switches the motor ON/OFF at pre-configured times to pump water. The contactor coil is controlled by the timer, and the high-current supply to the pump motor is switched on and off by the contactor and maintaining both safety and reliability.
Here, the primary supply is tied to the timer input. Contactor coil (A1 A2) is associated with the timer output. The coil is switched on at the moment the timer is working, which closes the main contacts of the contactor and activates the pump motor. Once the timer is turned off, the coil de-energizes, and the motor is stopped.
Protection against overload is ensured by an overload relay or MC, and correct earthing is done to be safe. This approach prevents the timer relay not to carrying heavy current at once, which allows extending its life. The system is very popular with home water pumps, irrigation, and small industrial pumping applications, and offers convenience, energy savings, and safe operation of the motor.
Work / Installation (Inputs → Outputs)
Input: Main supply → MCB → Digital Timer → Contactor Coil → Pump Motor.
- Connect phase (L) and neutral (N) to the digital timer input.
- Connect the timer output to the contactor coil A1, and neutral to A2.
- Feed the main phase through the contactor’s input terminals (L1, L2, L3) and output to the pump motor terminals.
- Neutral and earth from supply are connected directly to the motor.
- Use MCB/RCCB for overload and leakage protection.
Output: When the programmed time arrives, the timer energizes the contactor coil, closing the main contacts and running the pump motor automatically.
Testing & Final Adjustments
Program the timer after wiring it into a short test cycle. Set up the supply; confirm that after the preset time, the timer activates the contactor coil and initiates the pump motor. Measure voltage across A1–A2 during ON and ensure that the motor halts when the timer is switched off.
Protection against test overload by simulating a high current; the MCB/relay must also trip in case overloaded. Check all connections are tight, phase/neutral polarity correct, and earthing. Set timer programs to preferred ON/ OFF. Label wiring to make it easier to maintain.
With this technique, water pumps in residential, irrigation, and small industrial installations will operate automatically, safely, and energy-efficiently.