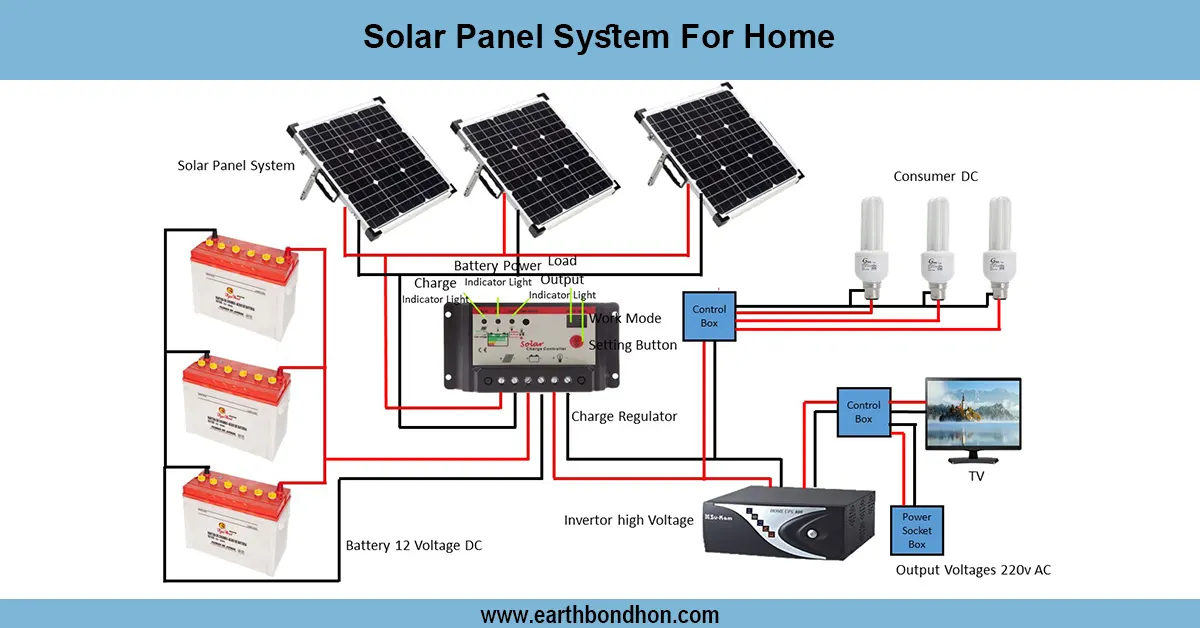
Solar System Wiring
Clear, step-by-step wiring diagram and installation guide for residential solar PV systems — covering panel array, inverter, charge controller, battery bank, earthing, and safety checks.
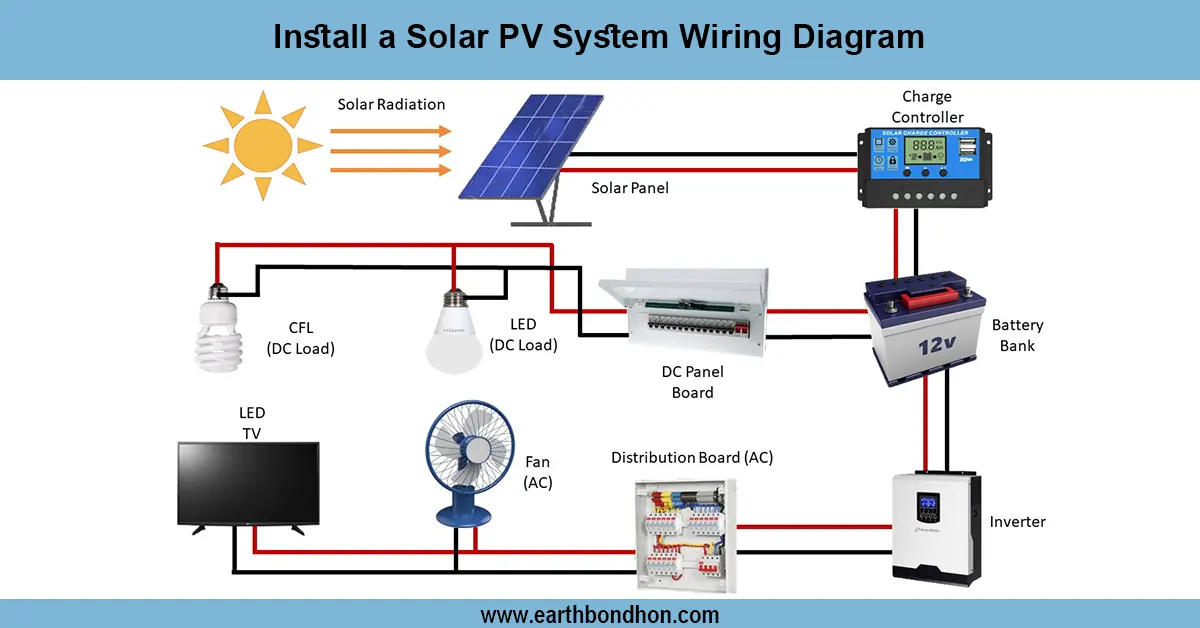
inverter to battery wiring diagram:
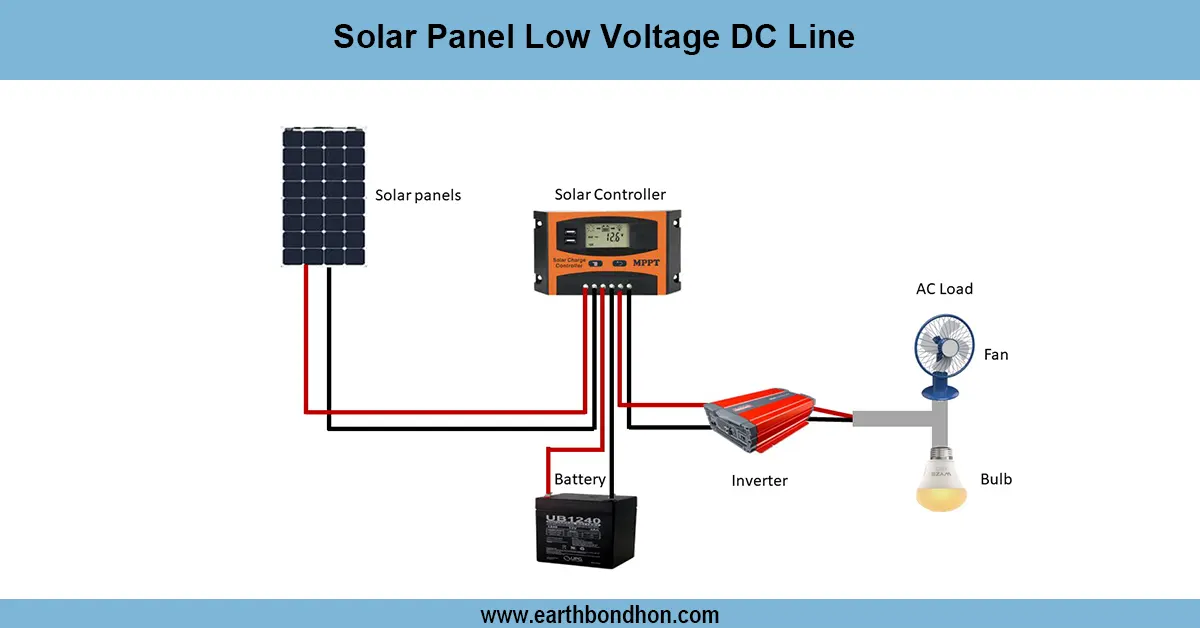
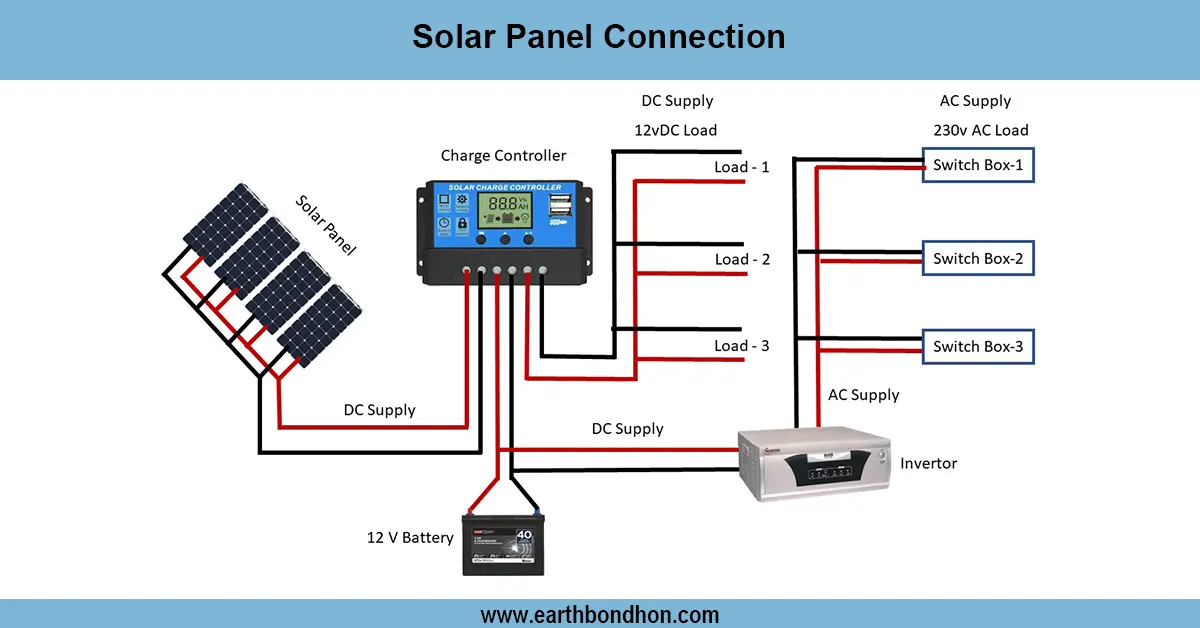
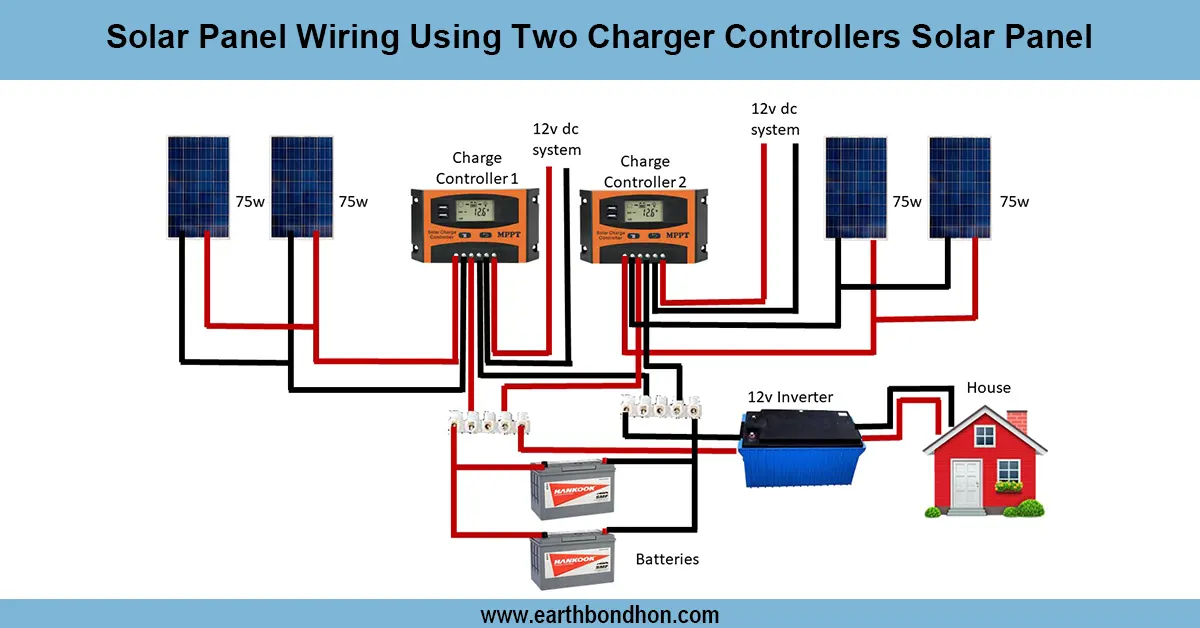
A comprehensive solar PV wiring diagram illustrates the flow of energy to the charge controller and converter, via the DC isolator and combiner to the battery (where present) and AC distribution panel - specifying cable sizes, fuses, and earthing. Proper polarity, isolators, and breakers rated correctly, test step-by-step to provide efficient and safe delivery of power.
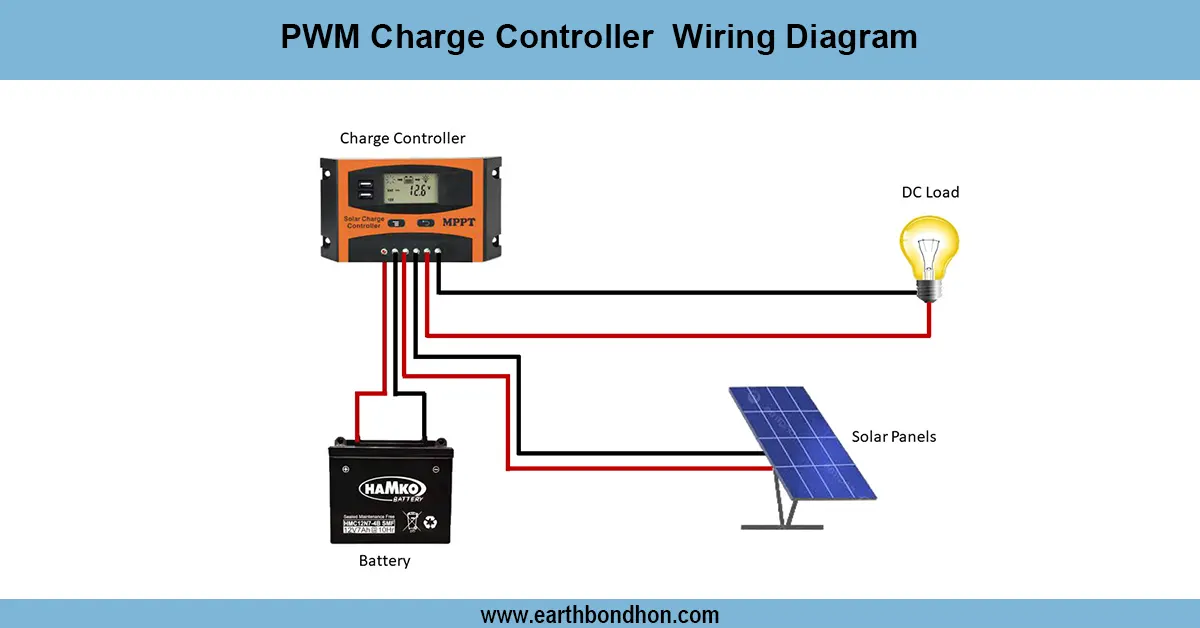
charge controller wiring steps:
The guide covers residential solar PV wiring in simple language for DIYers and installers. It discusses the process of wiring solar panels in series and parallel to fit the system voltage and current, as well as how to tie the strings to a combiner box, DC routing to charge controllers and inverters, and safe battery-bank wiring in off-grid systems. Major components of the system, including PV array, combiner, DC isolator, charge controller, inverter/charger, batteries, AC distribution, and earthing, are outlined with input/output connections and useful advice on cable size, overcurrent protection, conduit routings, and grounding. The content gives much attention to safety, code compliance, and testing procedures to enable the small installers and homeowners to design installations that perform and are reliable to the expectations.
⚡ Work & Installation (Input → Output):
Input: Solar irradiance (sunlight) → PV panels transform sunlight into DC strings (series/parallel) → combiner box DC strings(series/parallel) → DC isolator (charge controller controls battery charging) → inverter (DC into AC) → AC distribution panel loads (house/grid feed). Output: Secure AC power to the house or export; system performance monitored and controlled components through breakers/isolation/earthing.
Testing & Final Adjustments:
Once wired, carry out systematic tests: check open-circuit voltage (Voc) of each panel/string, measure short-circuit current (Isc), where safe, check proper MPPT/charge controller settings of array voltage, and test battery float/absorption voltages where provided. Measure the polarity of each junction with a multimeter, then connect inverters or batteries. Check and tighten all terminals to the manufacturer's specifications, check fuse/breaker ratings and locations, and make sure that DC cable runs are in fire-rated conduit where needed. Conduct an insulation resistance test of long runs. Test the system step by step: array to charge controller to battery to inverter to AC loads; check voltages, currents, and inverter fault indicators. Finally, some fine-tuning of MPPT parameters, grid-tie export settings (where used), labeling of all isolators and points of distribution, and as-built documentation should be finalized. Arrange a final inspection of the safety and local codes inspectorate before normal operation.