Forward Reverse Motor Control Diagram:
This diagram shows how to make a forward reverse motor control diagram. In this circuit, we use an SP MCB ( Single Pole Miniature Circuit Breaker ), two magnetic contactors, three timers, a stop switch, and a start switch. First, we need to input phase connection to SP MCB, then input power to switches and timer one, then input power line to timer two, timer three, and contractors. Then input neutral connection to contactors and timers. Now this circuit is ready for use, If you want to know more about this circuit please check our youtube video below the link.
Advertisements
Diagram of Forward Reverse Motor Control:

Components needed For this Project:
You can get the components from any of the sites below:
- SP MCB 10A [See Buy Click Amazon]
- Push Button NC Switch [See Buy Click Amazon]
- Push Button NO Switch [See Buy Click Amazon]
- 8 Pin Timer 220V AC [See Buy Click Amazon]
- Magnetic Contactor 40A [See Buy Click Amazon]
*Please note: These are affiliate links. I may make a commission if you buy the components through these links. I would appreciate your support in this way!
Advertisements
Components used to make the Forward Reverse Motor Control:
01. SP MCB:
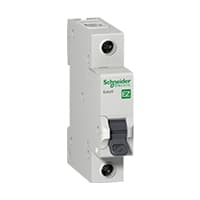
In single-pole MCB, Switching and protection are Affected in only one Phase. Single phase supply to break the phase only. A single Pole breaker is Typically used with 120-volt Circuits, and a 6-20 amps Miniature Circuit Breaker. They are constructed with one Line Wire and one Neutral wire. A Single Pole switch is the most basic General-Purpose switch that you use to Control a light or another device from one location. These Switches have 2 Brass-Colored screw Terminals Connected to the hot Power source wires. Pole refers to the number of Circuits Controlled by the Switch SP Switches Control only one Switch Electrical Circuit.
02. Stop Switch:
An NC (Normally Closed) Push Button is a Push Button That, In Its Default State, Makes Electrical Contact With The Circuit. An NC (Normally Closed) Push Button is a Push Button that, in its Default State, Makes electrical Contact With the Circuit. When The Button Is Pressed Down, The Switch no Longer Makes Electrical Contact And The Circuit is Now Open. When The Button is Not Pressed, Electricity Can Flow, But When it is Pressed The Circuit is Broken. This type Of Switch is Also known As a Normally Closed (NC) Switch.
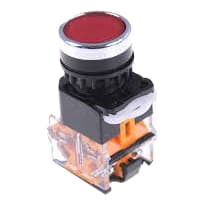
03. Start Switch:

NO (Normally Open) Terms Refer to a Type of Dry Contact or Wet Contact. A Push to Make Switch Allows Electricity to flow Between its 2 contacts when held in. When the button is released, the Circuit is broken. This type of Switch is also known as A Normally Open (NO) Switching system. As its name implies, a Normally Open (NO) Switch Contact or “a Contact” is a Switch. Put very simply, a Normally Open Sensor will have no Current When in a Normal State But When it Enters an Alarm State it will have +5V applied to the Circuit.
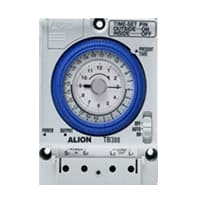
04. Timer:
A timer is a type of time-switching device that controls and controls Electrical circuits and electrical and electronic devices through time setting (on/off). The timer is basically 8-pin. Like other controlling devices the timer has a coil and when this coil is magnetized, the timer works on/off. The timer has 2 common ends and each common end has normally close and normally open options. When the timer is set by time, the timer trips at the end of that time and turns the common is normally closed (on) to open (off) and normally open (off) to close (on). This is how the timer works.
05. Magnetic Contactor:
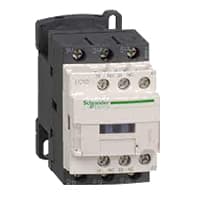
A magnetic contactor is an electromagnetic switching device. It is generally used for controlling 3-phase Motors. The operation of a magnetic contactor is similar to that of a Relay. but a relay is used for low-power or low-voltage connections, and a magnetic contactor is used for high-power or high-voltage connections. As soon as the supply is applied to the magnetic contactor coil. its normally open contacts are closed and normally closed contacts are opened and the associated devices are also operated. This is how a magnetic contactor works.
Thank You for visiting the website. Keep visiting for more Updates.
Frequently asked questions
Forward/Reverse Control Circuits – Basic Motor Control If a motor is to be driven in 2 directions, then it will require a Forward / Reverse motor starter, which has two three-pole horsepower supply-rated contactors rather than just one as in the conventional starter. Each of the 2 different motor starters supplies the motor with a different phase rotation.
Once started, a single-phase induction motor will happily run in either direction. To reverse it, we need to change the direction of the rotating magnetic field produced for the running and starter windings. This could be accomplished by reversing the polarity of the starter winding.
The Reversing Starter is a special type of push button starter wherein addition to starting/ stopping the motors the director of rotation of a 3-phase induction motor can be done for interchanging the connection of any 2 terminals of the supplies which was done through two separate contactors, one for forward and.
Both forward and reverse operations of a 3-phase induction motor are important for controlling the direction of mechanical motion in various industrial and commercial applications.
Two Magnetic Contactors are required to run a 3-phase motor forward and reverse From one Magnetic Contactor, 3 phase is directly supplied to the 3-phase motor through overload protection, and through the other Magnetic Contactor, 3 phase is given by changing two phases.
Read more Single Phase Wiring
What is a kilowatt-hour (kWh) | kwh formula | What does kwh mean
Introduction to Electrical Units and CircuitskW and kWh on your electricity bill As your home uses electricity during...
What is the Difference Between kVA | What does KVA mean | kVA formula
Difference Between KVA ExplainedWhat does KVA Mean? There are technical terms aplenty when it comes to generators, and...
Power Factor | Power Unit | Energy | Electricity Unit
Power factor definition | Calculating Power FactorPower Factor Values In a purely resistive circuit, the power factor...
0 Comments
Trackbacks/Pingbacks