

Single Phase Motor Starter with Timer
Learn single-phase motor starter wiring with timer, including auto-start/stop, DP switch/MCB protection, safe operation, and step-by-step installation diagram.
electrical socket wiring
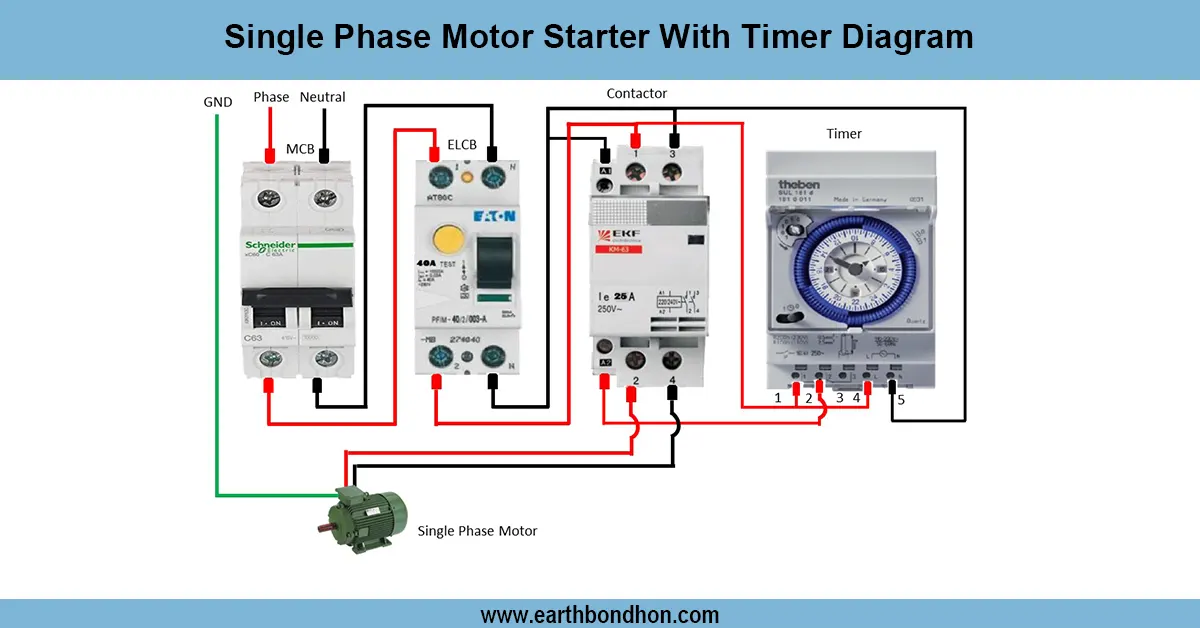
The operation of a single phase motor using a supply is shown on a time diagram using a single stage motor starter which has a timer relay connected to the supply which is diverted through a DP switch or MCB to the timer relay that has a coil of a motor starter that is connected to the motor supply and timer relay to control the start and stop button.
single phase motor starter with timer:
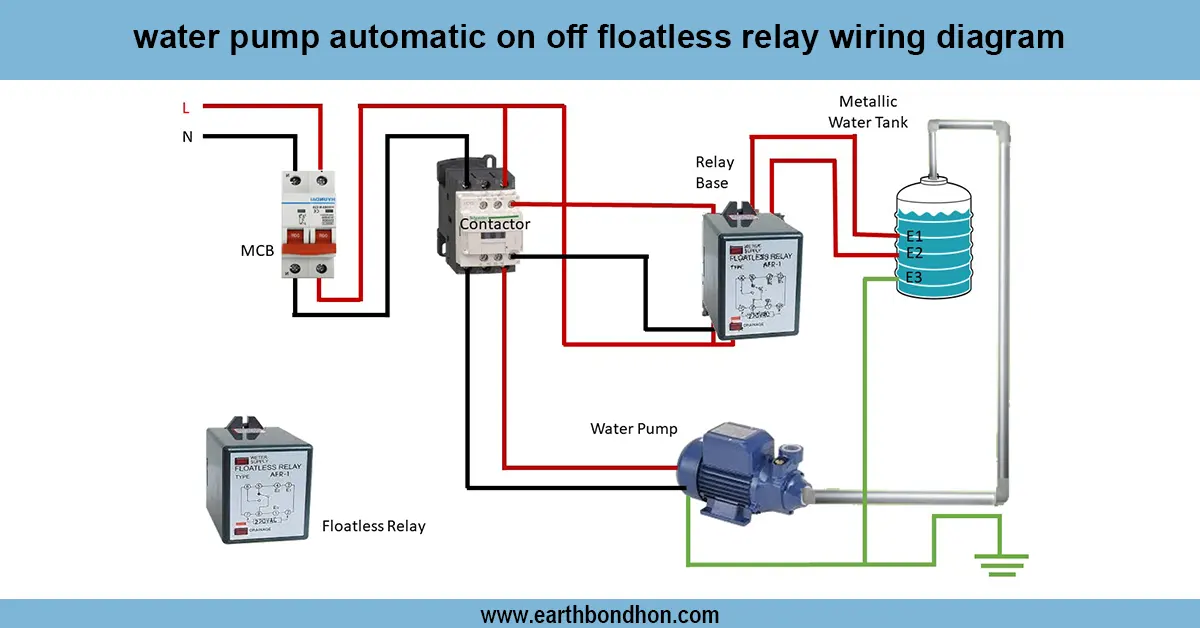
One of the phase motor starters, over time, permits automatic motor control according to a set time. The motor starter will have a DP switch/MCB to give protection and a timer relay to operate automatically. The supply phase and neutral go to the DP switch/MCB, by which the phase and neutral are connected, thence to the timer relay, which activates the coil of the motor starter. This arrangement is mostly applied to water pumps, conveyors, or fans, which require time-scheduled operation. The times that the motor starts and stops are set by timer settings. Safe: ty. It must be properly earthinged. The diagram indicates the connection of the motor, starter coil, timer relay, and protection devices. When this system is used, it will have the benefit of automatically starting and stopping the motor, minimizing human intervention, eliminating overuse, and safeguarding the motor against electrical faults.
Work & Installation (Input → Output,)
- Input Supply: Phase and neutral wires from the main line.
- DP Switch / MCB: Provides isolation and overload protection.
- Timer Relay: Connected after DP switch to control starter coil based on preset timing.
- Motor Starter Coil: Activated by timer relay to switch the motor ON/OFF automatically.
- Motor Terminals: Connected to starter output as per wiring diagram.
- Earthing: Motor frame, starter, and switchboard grounded properly.
- Output: Motor starts and stops automatically according to the timer setting, with protection against overload and short circuits.
Testing & Final Adjustments
Wire Once wired, ensure that all connections are insulated. Test time: Put the timer on a test time and put the DP switch/MCB on. Note that the timer relay switches on the starter coil, and the motor automatically starts. At the expiry of the preset time, the timer relay shuts down the starter coil, and the motor is switched off. Check the voltage on the terminals of the motor (around 220V-240V) and confirm that it works well without heating up or unusual noise. Check earthing and make sure that metal frames are grounded. Set the timer to the necessary working times. Check overload protection circuit breakers in case of overcurrent. Label all parts, such as the DP switch, timer, starter, and motor terminal, to identify them easily. These checks will provide a good automated motor control, safe operation, and electrical hazard protection.