
Motion sensor connection in security system
Step-by-step wiring diagram and clear instructions to install a motion sensor with an inline switch safe, tested wiring for common household lighting circuits.
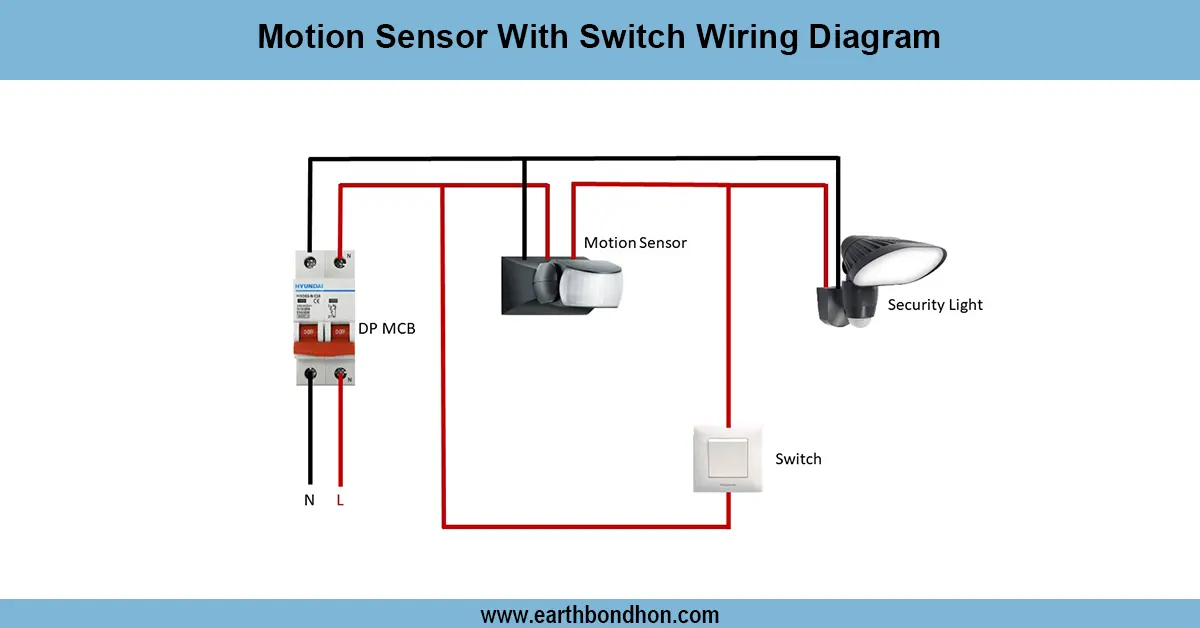
single-pole motion switch wiring
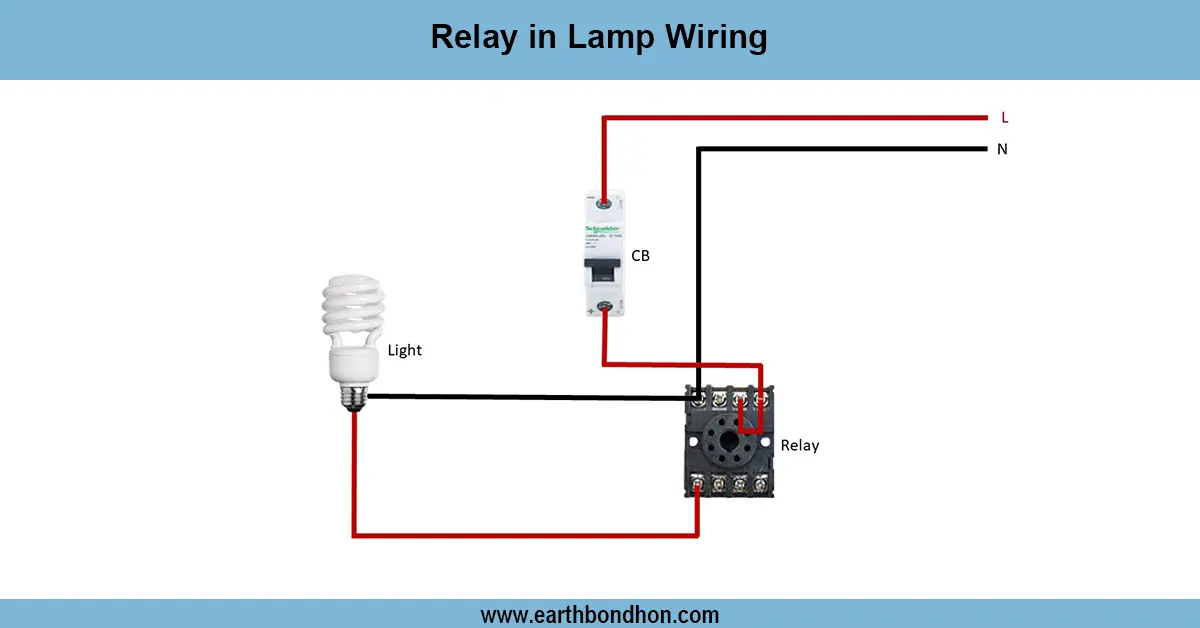
A motion sensor with switch wiring, which connects the line (hot) of the breaker to a sensor module, followed by the light (load), and a manual switch to the line (hot) wired in series (to turn off energy to the sensor and the load) or in parallel as an override. Common single-pole single-phase wiring configurations are Line to Sensor to Load, Ground looped directly to sensor and light (where necessary), Ground to all metal. Disconnect the power, test with a voltage detector, and connect according to the diagram of the arrangement you have selected, and retest.
Motion Sensor Light Switch Diagram Summary
A useful and easy-to-follow tutorial on how to wire a manual switch to a motion sensor to switch on household lights. This paper describes the common features (line, load, neutral, ground, sensor module, and mechanical switch), common wiring configurations (sensor before switch, switch before sensor, and parallel override), and safety measures (turning off the breaker, checking for no voltage, and using suitable connectors). Single-pole circuits with incandescent, LED, and CFL loads are discussed by diagram and step-by-step. It is also mentioned in the guide that there are compatibility problems (sensor-neutral, inrush current with some LEDs) and tips to troubleshoot, such as false triggers or flickering lights. With installation recommendations, correct wiring, and adherence to the wiring diagrams, you will have a stable motion-sensitive light with a convenient on/off override to prevent accidents.
Work, Installation — Inputs → Outputs
Outputs: mains Line (hot), Neutral, Ground, sensor module terminals (Line in, Load out, Neutral if required), optional manual switch terminals, lighting fixture. Operation: 1. Kill power; 2. Mount sensor and switch to correct boxes; 3. Connect neutrals (unless sensor requires neutral); 4. Route Line through sensor (or switch); 5. connect sensor Load output to the hot of a fixture; 6. bond ground; 7. tighten connectors and assemble devices; 8. restore power and sensor sensitivity/time setting. Outputs: Light is operated automatically by motion sensing and manually by switch override or series cutoff upon wiring selection, sensor timing, and sensor sensitivity control auto-off operation.
Testing and Final Adjustments
When wired and power is restored, test in stages: ensure that the sensor is operational (indicator LED, where required). Enter the detection zone to check that the light is turned on and remains on during the period of the set time. Check the manual switch in both modes (ON and OFF) to check expected behavior - if wired in series, the switch must completely cut off; if wired as an override, the switch must switch the light on, whether the sensor is active or not. Sensitivity and time-out: make sensitivity higher when the false triggers are too high, and time should be longer when the light shuts off too fast. LED/CFL loads: Check flicker; install sensor models with an electronic load, or add a dummy load. Last but not least, seal all the devices, label a breaker, and record sensor settings. When issues do not disappear, retest the neutral connection and verify that the sensor model is correct about the type of fixture and load wattage.