Before going straight to building the web server, it is important to outline what our web server will do, so that it is easier to follow the steps later on.
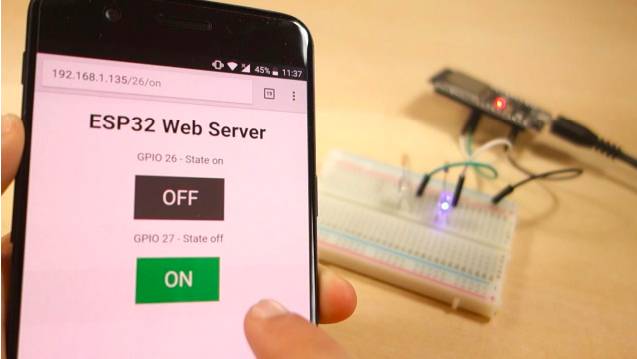
- The web server you’ll build controls two LEDs connected to the ESP32 GPIOs 26, and 27.
- You can access the ESP32 web server by typing the ESP32 IP address on a browser in the local network.
- By clicking the buttons on your web server you can instantly change the state of each LED. This is just a simple example to illustrate how to build a web server that controls outputs, the idea is to replace those LEDs with a relay, or any other electronic components you want.
circuit Schematic
Start by building the circuit. Connect two LEDs to your ESP32 as shown in the following schematic diagram – with one LED connected to GPIO 26, and another to GPIO 27. Here’s a list of parts you need to assemble the circuit:

Arduino Code
Setting Your Network Credentials
You need to modify the following lines with your network credentials: SSID and password. The code is well commented on where you should make the changes.
// Replace with your network credentials
const char* ssid = “”;
const char* password = “”;
Finding the ESP32 IP Address
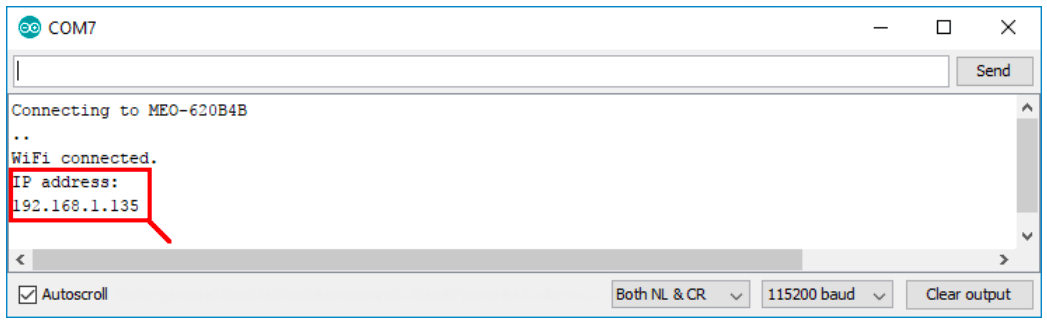
Now, you can upload the code, and it will work straight away. Don’t forget to check if you have the right board and COM port selected, otherwise, you’ll get an error when trying to upload. Open the Serial Monitor at a baud rate of 115200.

The ESP32 connects to Wi-Fi and outputs the ESP IP address on the Serial Monitor. Copy that IP address, because you need it to access the ESP32 web server.
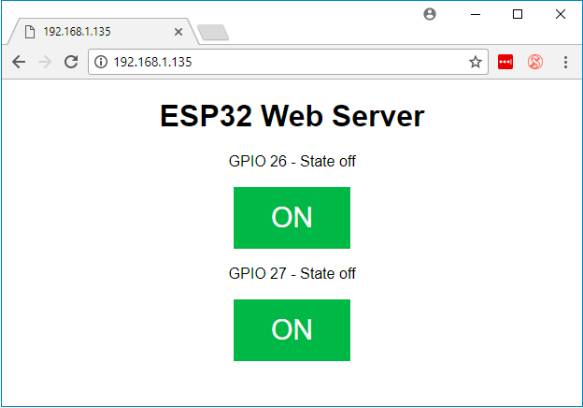
Accessing the Web Server Open your browser, paste the ESP32 IP address, and you’ll see the following page
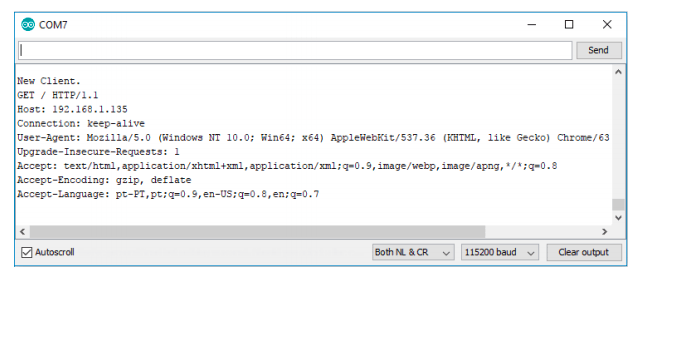
If you take a look at the Serial Monitor, you can see what’s going on on the background. The ESP32 receives an HTTP request from a new client (in this case, your browser). You can also see other information about the HTTP request, the HTTP header fields that define the operating parameters of an HTTP transaction.
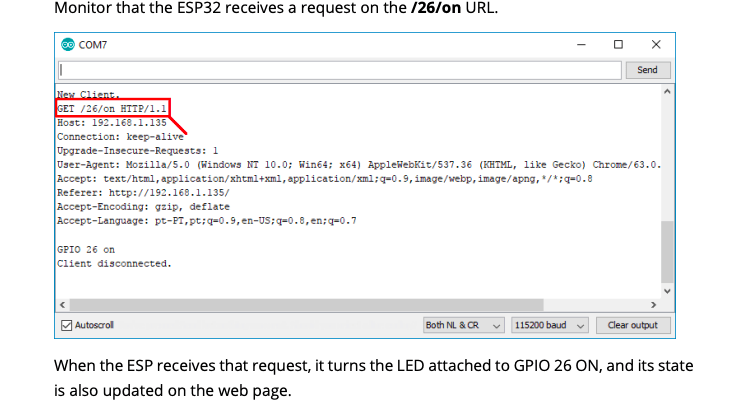
Testing the Web Server Let’s test the web server. Click the button to turn GPIO 26 ON. You can see on the Serial Monitor that the ESP32 receives a request on the /26/on URL.
Your content goes here. Edit or remove this text inline or in the module Content settings. You can also style every aspect of this content in the module Design settings and even apply custom CSS to this text in the module Advanced settings.